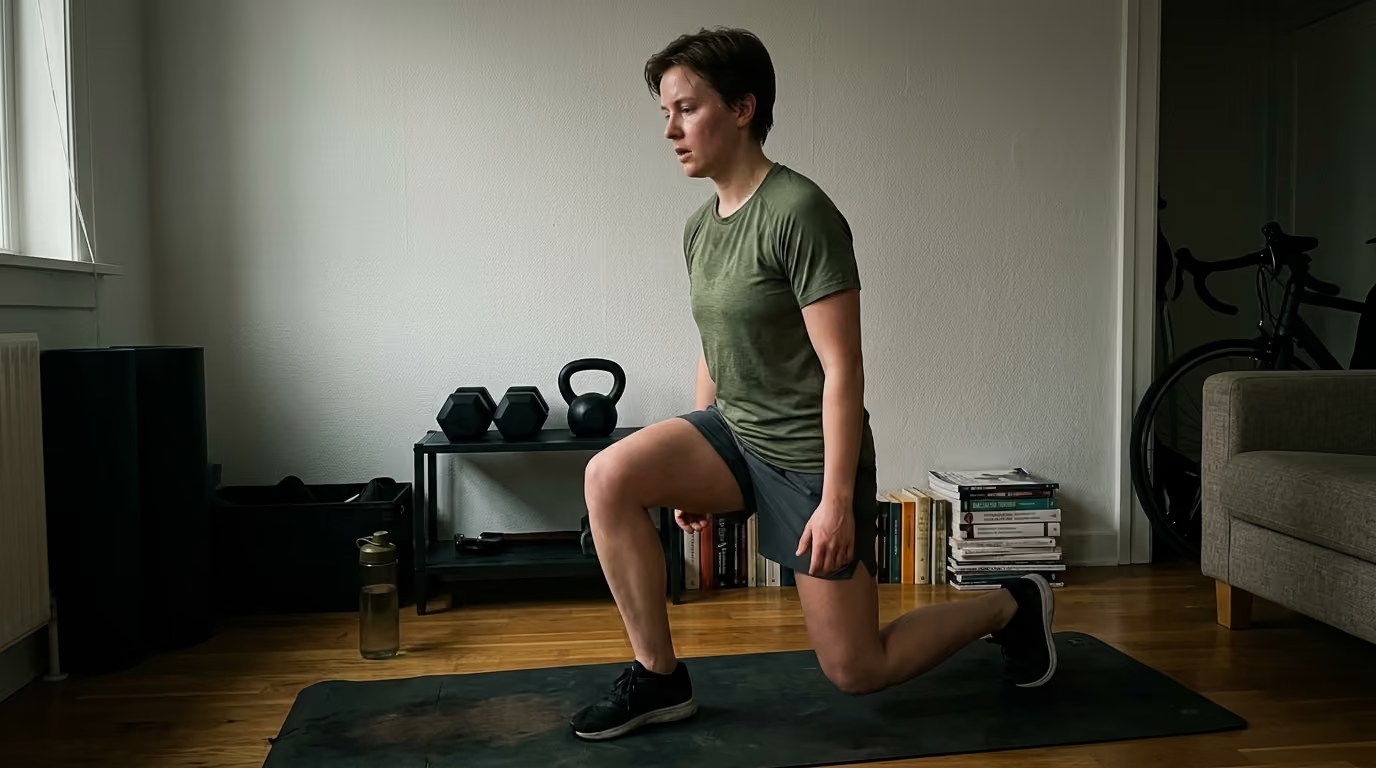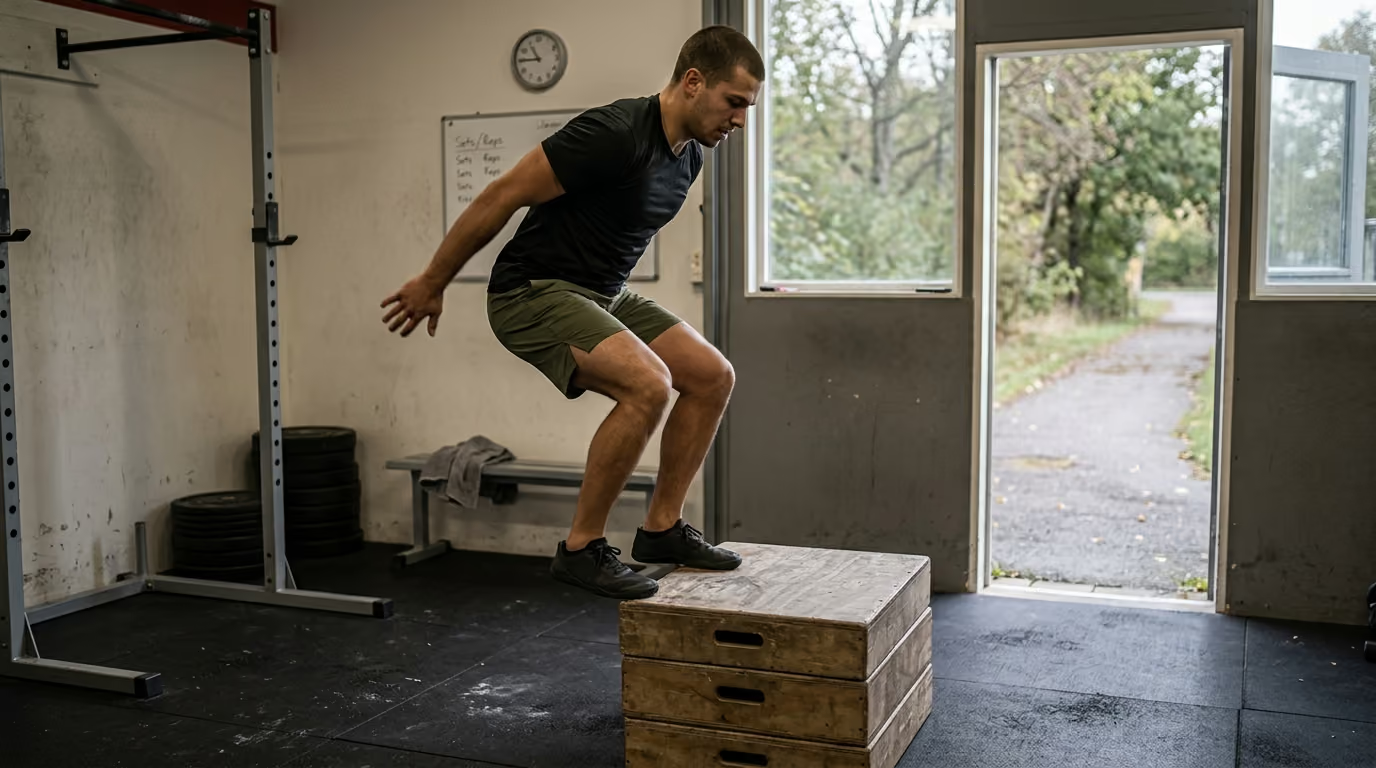

Dropping from a high obstacle with heavy body armor requires progressive plyometric conditioning to absorb extreme forces and prevent joint injuries.





You drop from the back of a tactical vehicle or land awkwardly after clearing a ditch, feeling a sharp jolt travel straight through your knees and lower back. Your joints ache for two days afterward, and your sprint speed feels sluggish despite regular barbell lifting and miles of weekly running. Many service members look for ways to build explosive power and jump higher without causing chronic joint pain. This resource provides a practical framework for plyometric training, detailing how to absorb force, progress movement intensity, manage ground contacts, and integrate explosive work into a military routine.
A properly designed plyometric program trains your neuromuscular system to absorb, stabilize, and redirect force rapidly, improving sprint acceleration and movement efficiency while protecting joint integrity.
Plyometric training is not merely a collection of high jumps or an exhausting conditioning circuit. It is a systematic progression that teaches your muscles and tendons to store and release elastic energy efficiently. When integrated with foundational strength and cardiovascular work, plyometrics bridge the gap between static lifting in the gym and dynamic, unpredictable movements in the field.
Plyometric drills involve explosive actions where a muscle rapidly transitions from lengthening under load to shortening to produce movement. This transition is known as the stretch-shortening cycle. Understanding how this mechanism works allows you to select the right drills and avoid common programming mistakes.
The stretch-shortening cycle consists of three distinct phases. The first is the eccentric phase, where the body absorbs force as the active muscles and connective tissues lengthen. The second is the amortization phase, which is the brief transition period between force absorption and force production. The third is the concentric phase, where the muscles contract rapidly to propel the body into a jump, bound, or sprint.
The duration of the amortization phase dictates the mechanical efficiency of the movement. If the transition takes too long, the elastic energy stored in the tendons dissipates as heat, and the mechanical advantage is lost. High-velocity plyometrics train the nervous system to minimize this transition window, creating rapid, powerful movement output.
Maximal strength is the absolute force a muscle can produce against an external resistance, such as during a heavy barbell back squat. Reactive strength is the ability to change quickly from an eccentric braking action to a concentric propulsive action. While maximal strength provides the structural foundation for force production, it does not guarantee rapid force transfer.
A service member may possess a double-bodyweight squat yet struggle to accelerate across a short gap or land softly from an obstacle. Conversely, an individual with high reactive capabilities but insufficient baseline strength may lack the structural resilience to tolerate high-impact landings. Long-term physical capability requires balancing both qualities through targeted training and performance guidance.
The Reactive Strength Index, commonly abbreviated as RSI, is a standard metric used to measure reactive jump capacity and ground-contact efficiency. RSI is calculated by dividing jump height by ground-contact time during a drop jump or rebound assessment.
An individual can improve their RSI by jumping higher from the same contact time, achieving the same jump height with a shorter ground contact, or improving both variables simultaneously. RSI serves as a helpful monitoring tool to evaluate neuromuscular readiness and training adaptation. It should not be used as an excuse to chase short contact times at the expense of sound joint alignment and landing mechanics.
Plyometric volume is measured primarily by counting ground contacts, which represent the number of times a foot strikes the ground during a jump, hop, or bound. A standard bilateral jump-and-stick counts as one contact upon landing. A set of ten low pogo hops represents ten contacts, while ten alternating single-leg bounds produce ten total contacts, five on each leg.
Accurately tracking contacts ensures that you do not overload tendons, ligaments, and bone tissue. Because volume affects fatigue, total contact numbers must be interpreted alongside drill intensity. As the height, speed, and unilateral demands of a drill increase, total session contacts must decrease accordingly.
Military tasks rarely occur in controlled environments with predictable footing. Personnel must frequently sprint between cover, clear obstacles, negotiate uneven terrain, brake suddenly, and carry external loads. These activities place massive eccentric and reactive demands on the musculoskeletal system.
Systematic reviews in sports science demonstrate that plyometric training reliably improves vertical jump height, linear sprint acceleration, and change-of-direction speed in active populations. Research published in Sports Medicine confirms that plyometrics produce notable improvements in lower-body strength and sprinting performance without requiring excess training time.
Linear sprinting requires rapid horizontal force application against the ground in very short contact windows. Traditional vertical jumping drills develop general leg extension, but horizontal displacement drills translate more directly to sprint acceleration. Meta-analyses examining sprint adaptations indicate that programs incorporating horizontal bounds, broad jumps, and sprint-specific drills produce superior gains in running speed compared to vertical jumps alone.
For tactical personnel, first-step acceleration often matters more than absolute top-end sprint speed. Developing stiffness in the ankle complex and power in the posterior chain allows a service member to move rapidly out of a low position. Combining horizontal jumps with short sprint transitions bridges the gap between gym-based strength and operational movement.
Field injuries frequently occur during deceleration, cutting, and landing rather than during propulsion. When a soldier steps off a vehicle or changes direction suddenly on loose gravel, the lower body must absorb several times body weight in milliseconds. If the hips, knees, and ankles cannot stabilize this force, excess strain shifts to passive connective tissues like the anterior cruciate ligament and meniscus.
Plyometrics teach the neuromuscular system to pre-activate muscles before ground contact, stiffening the joint complex and absorbing energy through active muscle tension. Controlled landing progressions train symmetrical force distribution and prevent valgus knee collapse. This structural durability supports long-term physical readiness and healthy joints across years of service.
Endurance performance in running and ruck marching depends heavily on movement efficiency. Running economy refers to the energy demand required to maintain a given submaximal running pace. Tendons act like biological springs, storing elastic energy upon foot strike and returning that energy during toe-off.
Research on endurance runners demonstrates that adding moderate plyometric volume to weekly training improves running economy and 10-kilometer performance without increasing total running mileage. Enhanced tendon stiffness allows service members to maintain pace with less muscular effort, preserving energy for other physical and operational tasks.
Much of the scientific literature on plyometrics is conducted on collegiate athletes or healthy civilian volunteers in controlled laboratory settings. These participants train on flat surfaces in standard athletic footwear while unencumbered by equipment. Military personnel operate under different physical constraints that influence how research should be applied.
Service members frequently train in combat boots, carry external loads ranging from 30 to over 80 pounds, and navigate broken terrain while managing operational sleep debt. These occupational factors increase baseline joint stress and fatigue. Consequently, military plyometric programming must prioritize conservative volume progressions, controlled movement quality, and intelligent recovery over arbitrary performance metrics.
A common mistake in plyometric training is attempting advanced reactive jumps before mastering basic deceleration mechanics. Jumping high is relatively simple, but absorbing the downward force safely requires deliberate technical practice. The following five-phase framework progresses systematically from foundational force absorption to advanced reactive movements.
Before introducing ballistic jumping, you must confirm adequate baseline movement quality, joint mobility, and tissue tolerance. A service member should be able to perform twenty controlled bodyweight squats to parallel without pain, hold a single-leg balance for thirty seconds per side, and tolerate basic running without joint irritation.
This initial screening is an informal movement check rather than a medical diagnosis. If you experience sharp joint pain, significant balance asymmetries, or severe knee cave during basic squats, resolve those issues with foundational strength and mobility work before adding ballistic impacts. Trainees with prior joint injuries can review structured guidance in our strength, fitness and body composition resources.
The first phase focuses exclusively on teaching the lower extremities to dissipate kinetic energy smoothly and quietly. Drills in this phase are performed with a deliberate stick, meaning you land and freeze in an athletic posture for two to three seconds to demonstrate complete stability.
Essential drills for Phase 1 include:
During every landing, the impact sound should be minimal. Your hips should hinge backward, your knees should stay aligned over your second toes, and your torso should maintain a neutral, braced spine.
Once quiet, controlled landings are consistent, you can introduce repeated low-amplitude contacts. These drills emphasize ankle stiffness, rhythmic coordination, and short ground contact times without subjecting the body to high drop heights.
Effective Phase 2 exercises include:
Phase 2 builds the structural capacity of the calf complex, Achilles tendon, and plantar fascia, preparing connective tissues for the higher forces of subsequent phases.
Phase 3 introduces maximal physical intent, requiring you to produce substantial force in vertical, horizontal, lateral, and diagonal vectors. Most drills in this phase emphasize concentric power output with controlled resetting between repetitions.
Key Phase 3 movements include:
Differentiating movement directions is vital for balanced physical development. Vertical jumps build clearance height, while horizontal and lateral jumps build the propulsive and cutting mechanics required for tactical maneuvers.
Phase 4 combines high force production with rapid ground redirection. Drills in this phase minimize the amortization phase, training the nervous system to switch from braking to propulsion in fractions of a second.
Standard Phase 4 drills include:
Volume in Phase 4 must remain moderate. The focus is maximal velocity and short contact times. If movement speed slows or landings become loud, end the set immediately.
The final phase introduces unpredictable cues, chaotic environments, and task-specific movement combinations. These exercises closely mirror operational conditions by requiring rapid decision-making and direction changes under high physical demand.
Representative Phase 5 drills include:
Advanced drills should only be attempted by trainees who have completed the previous four phases without pain or technical breakdown.
Choosing the right plyometric exercises depends on your current training objectives, previous injury history, and the physical qualities required for your duties. Classifying exercises by vector and support pattern ensures balanced programming across the training year.
Lower-body ballistic movements distribute mechanical forces differently depending on the direction of travel. A well-rounded program incorporates exercises across all primary planes:
Rotating through these vectors prevents repetitive movement stress on specific tendons while preparing the body for multifaceted physical tasks.
Bilateral drills, where both feet leave and strike the ground together, allow for high total power production and symmetric force absorption. Exercises like bilateral broad jumps and box jumps provide a stable foundation for developing baseline explosive capacity.
Unilateral drills, such as single-leg hops, alternating bounds, and split-stance jumps, introduce substantial stability challenges. Because running, cutting, and climbing are fundamentally single-leg actions, unilateral plyometrics are essential for eliminating side-to-side power deficits and building ankle-knee stability.
Traing terminology often confuses box jumps with depth jumps, yet their mechanical demands are entirely different. Understanding this distinction prevents premature joint overloading:
Service members managing knee or tendon irritation can utilize standard box jumps to build explosive power without subjecting their joints to the heavy braking forces of depth jumps.
Managing workload in plyometric training requires precise tracking of volume and honest evaluation of drill intensity. Unlike lifting, where fatigue causes a barbell to stall, excessive plyometric fatigue leads to subtle degradation of ground-contact mechanics, increasing injury risk over time.
Weekly and per-session contact limits should reflect an individual's training background, current body weight, and running mileage. The National Strength and Conditioning Association provides standard baseline ranges for single-session contact volumes:
These targets are practical starting points rather than rigid rules. When introducing high-intensity depth jumps or maximal bounds, keep contacts at the lower end of the spectrum. When performing low-intensity rhythm pogos or line hops, total contacts can sit comfortably at the higher end.
Several variables determine the true mechanical stress of a plyometric exercise:
As drill intensity increases, total session volume must decrease to preserve movement quality and protect joint structures.
Plyometric training is designed to develop neuromuscular power and reactive speed, not metabolic conditioning. Performing explosive jumps in a state of severe cardiovascular fatigue compromises landing alignment and increases ground contact time, defeating the purpose of the drill.
Rest intervals between plyometric sets should be generous, typically adhering to a work-to-rest ratio of 1:5 to 1:10. For a set of five maximal broad jumps taking roughly five seconds, rest between thirty and fifty seconds before the next effort. If your jump height noticeably declines or your landings become visibly heavier, end the exercise regardless of prescribed repetitions.
Tactical personnel must balance concurrent demands: heavy strength training, high-mileage running, loaded ruck marching, and tactical drills. Integrating plyometrics requires careful scheduling to avoid lower-extremity overuse injuries.
When combining plyometrics with resistance training in the same workout, several sequencing strategies can be employed depending on your primary training goal:
For the majority of service members, Model A provides the best balance of safety, power development, and training quality.
Running, sprinting, ruck marching, and plyometric training all direct repetitive ground impacts through the lower body. Stacking high-intensity hurdle hops on the same day as a fast five-mile run or heavy ruck march can overwhelm the Achilles tendons and shin splints often result.
To manage overall lower-extremity stress, organize your weekly schedule into dedicated high-impact days and low-impact recovery days:
Do not attempt maximal reactive plyometrics immediately following an exhaustive field exercise or prolonged ruck march. Prioritize tissue recovery, sleep, and proper nutrition as detailed in our recovery and sleep resources.
The following templates illustrate how to integrate plyometric training into balanced weekly routines for different training levels.
Tracking objective performance metrics and movement quality prevents overtraining and ensures continuous physical adaptation. Consistent monitoring allows you to adjust volume before minor joint irritation becomes a chronic overuse injury.
During any plyometric drill, monitor for specific warning signs that indicate immediate technical degradation:
If any of these signs appear, reduce the drill complexity, lower the box height, or conclude the plyometric portion of the session.
You do not need an advanced sports science laboratory to monitor your reactive readiness. Simple field assessments provide immediate feedback on central fatigue:
Listening to these markers protects your joints and ensures that every plyometric contact delivers a positive training stimulus.
Examining how different physical profiles approach plyometric programming highlights the importance of individual customization.
A 215-pound infantry soldier possesses a 425-pound back squat but records slow times in short sprint assessments. His landings are stiff and heavy.
Strategy: Instead of high-impact depth jumps, he completes Phase 1 snap-downs and Phase 2 pogo jumps to build tendon elasticity. His explosive work focuses on horizontal broad jumps and medicine ball sprint starts. Within eight weeks, his ankle stiffness improves, leading to a faster first-step sprint acceleration without knee irritation.
A female service member logs thirty miles of running per week and experiences recurring lower-leg soreness. She struggles with single-leg balance and jumping power.
Strategy: Her running mileage is temporarily reduced by twenty percent to allow tissue recovery. She introduces low-amplitude jump rope, bilateral box jumps onto elevated surfaces (which minimize landing stress), and single-leg balance holds. Over six weeks, her foot and ankle complex stiffens, resolving her shin discomfort and improving her running economy.
A veteran transitioning out of active service wants to regain athletic agility after years of heavy load carriage but suffers from mild joint stiffness.
Strategy: The veteran avoids all high-drop reactive jumps and works through Phase 1 landing drills, focusing on quiet deceleration, split-stance balance, and lateral hops to a stick. This gradual exposure rebuilds tendon tolerance and movement confidence, supporting long-term joint health and healthy aging.
Use this practical checklist to integrate plyometric training into your weekly routine effectively:
This guide provides general educational information on physical conditioning and plyometric training principles for military personnel and veterans. It does not constitute individual medical advice, physical therapy prescription, or clinical rehabilitation. If you have a history of orthopedic injury, chronic joint pain, cardiovascular conditions, or surgical intervention, consult a qualified physician or physical therapist before introducing high-impact plyometrics into your physical training program.
You should master all five movement phases unloaded before attempting any drills under external load. When introducing gear, restrict the stimulus to low-amplitude rhythm drills like light pogo hops or low skips while wearing a light vest under fifteen pounds. Never perform high-drop depth jumps or maximal hurdle rebounds under heavy external loads, as the dramatic increase in ground-reaction forces significantly increases injury risk without offering extra sprint performance benefits.
Soreness in the tendons or joint spaces indicates that the current combination of volume, intensity, and frequency exceeds your tissue capacity. Immediately suspend high-velocity reactive jumps, continuous hurdle hops, and depth drops. Replace them with low-impact eccentric strength exercises, such as slow calf raises, Spanish squats, and isometric wall sits. Reintroduce low-amplitude jumps only after joint pain has fully subsided for at least two consecutive weeks.
Calisthenics are typically performed at submaximal speeds for high repetitions to build metabolic conditioning and muscular endurance. Plyometrics require maximal physical intent, short ground-contact times, and generous rest intervals to train neuromuscular power and elastic energy return. Performing jumps to exhaustion transforms the exercise into a conditioning circuit, degrading landing mechanics and eliminating the reactive power training stimulus.
Plyometric training is designed specifically to enhance neurological efficiency, movement speed, and tendon stiffness. Clinical meta-analyses indicate that while plyometrics improve sprint times, jump heights, and maximal strength, they do not produce meaningful changes in muscle hypertrophy or body fat reduction. For changes in body composition, rely on structured progressive resistance training, consistent aerobic conditioning, and sound nutritional habits.
Follow BattleVet for practical guidance on military and veteran health, strength, recovery, testosterone, sleep and healthy aging. Stay connected for new articles, research backed insights and clear information to help you stay capable for the years ahead.


Build better habits around strength, recovery, sleep, hormones and healthy aging with practical guidance for active military personnel and veterans.
Explore BattleVet