
Heavy backpacks often cause sore joints, but progressive ruck training builds durable strength and aerobic capacity through controlled weekly mileage increases.





Most people assume that building ruck endurance requires grabbing the heaviest pack available and grinding through miles of rough terrain every weekend. That brute force approach usually leads to inflamed joints, blistered feet, and chronic back pain long before it builds meaningful conditioning. You wake up on Monday morning with aching hips, throbbing calves, and a stalled pace, wondering why your hard work produces fatigue instead of progress. Real load-carrying capacity comes from controlled mechanical adaptation rather than sheer exhaustion.
Gradual exposure to specific training variables allows your bones, connective tissues, and aerobic system to adapt to heavy loads without unnecessary overuse injuries.
Ruck training is a disciplined method of loaded walking that builds aerobic endurance, muscular stamina, and structural resilience by carrying external weight over distance. To build load-carrying fitness safely, keep external pack weight below thirty percent of your body mass during base phases, progress only one variable at a time, and maintain a sustainable aerobic pace.
Carrying a loaded pack is fundamentally different from standard walking or running. When you place external weight on your torso, your center of mass shifts backward and upward. To maintain balance and forward momentum, your body alters its movement mechanics. Biomechanical research shows that carrying a backpack increases forward trunk lean, alters hip and ankle ranges of motion, and significantly increases ground reaction forces.
Your stride naturally changes under load. Cadence typically increases while stride length shortens to maintain dynamic balance across uneven surfaces. These adjustments increase the work required from your lower extremities, spinal erectors, and stabilizing musculature. A systematic review published in Sports Medicine confirmed that carrying loads alters lower-limb kinematics and increases total mechanical work on the knees and ankles.
It helps to divide the stress of ruck training into distinct categories:
Cardiovascular fitness improves much faster than structural tissue adaptations. Your lungs, heart, and aerobic enzymes may feel fully prepared to carry a forty-pound pack for six miles after just a few weeks of consistent training. However, your bones, cartilage, tendons, and foot skin adapt slowly over months of repeated exposure. Moving too fast creates a dangerous mismatch where your engine outpaces your chassis, resulting in shin splints, plantar fasciitis, or stress fractures.
Research from the Defense Technical Information Center shows that increasing either the carried load or walking speed increases bone-on-bone compressive forces and peak ground reaction forces. This compound loading accelerates fatigue in stabilizing muscle groups. When supporting muscles fatigue, shock absorption declines, shifting destructive impact forces directly onto the skeletal structure.
Defining your total carried load accurately is the first step toward structured progression. Total load includes the dry weight of your pack, frame, bladder, water, nutrition, extra clothing, and any carried tools. A session programmed for twenty pounds can easily creep up to thirty-five pounds once full water bladders and heavy accessories are added. Always weigh your pack fully loaded before starting your session to track training volume accurately.
Military medical guidance published by the Army Public Health Center advises establishing individualized load targets based on body size and baseline fitness. A key guideline from Army medical researchers suggests keeping training march loads below thirty percent of total body weight. Carrying loads heavier than thirty percent of your mass accelerates gait breakdown, forces excessive forward trunk lean, and increases injury risk in smaller individuals.
For general physical conditioning and foundational preparation, starting loads should be much lighter. Beginning at ten to fifteen percent of body mass gives your connective tissues time to adapt to new shear and compressive forces. As your movement economy improves, you can gradually progress toward heavier operational standards.
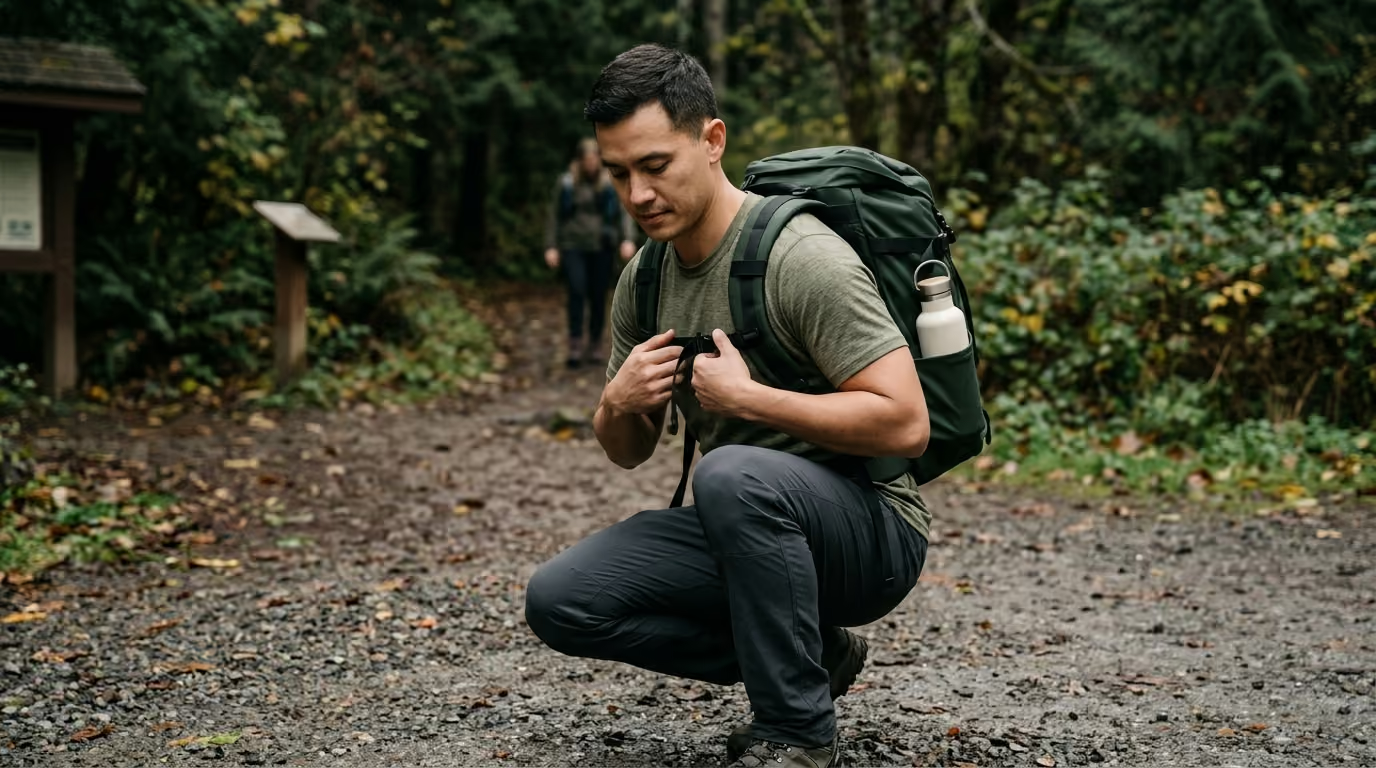
Pack geometry and fit dictate how external mass interacts with your spine and pelvis. A quality pack system should stabilize the weight close to your spine and transfer a significant portion of the load to the hips.
Follow these practical steps to optimize pack setup:
Carrying asymmetrical loads, such as a heavy pack slung over one shoulder or an unbalanced internal frame, introduces uneven spinal loading. Keeping the pack balanced and snug against your torso reduces rotational torque and conserves muscular energy over long distances.
The most common mistake in load-carriage programming is increasing distance, load, and speed simultaneously. Total training stress is a product of load, distance, pace, terrain difficulty, and environmental conditions. If you increase multiple variables at the same time, total mechanical strain multiplies quickly and overwhelms your tissue tolerance.
Army foot-march doctrine emphasizes progressing load and distance on separate training tracks. If your objective is to increase your pack weight from twenty pounds to thirty pounds, keep your distance short and your terrain flat. If your objective is to move from four miles to eight miles, keep your pack light.
A sustainable long-term framework moves through five clear developmental stages:
Before adding substantial weight, build baseline volume with unweighted or very lightly weighted brisk walking. Focus on steady cadence, upright posture, and consistent time on your feet. Accumulating three to five hours of weekly walking conditions the feet and calf musculature for repetitive ground impacts.
Introduce a light load, roughly ten to fifteen percent of your body mass. Keep the terrain flat and maintain an easy, conversational pace. This stage teaches you how to adjust your pack harness, manage pressure points, test your footwear, and maintain upright spinal alignment under mild load.
Maintain your familiarization load while gradually increasing your walking distance or total time under tension. Adding ten percent to your total weekly distance allows your cardiovascular base and foot tissues to adapt without excessive joint compression. This builds local muscular endurance in the calves, glutes, and upper back.
Reduce your total mileage by twenty to thirty percent and systematically increase pack weight toward twenty-five to thirty percent of body mass. Use shorter routes to study how the heavier weight alters your foot strike, breathing rhythm, and trunk stability. Keep pace strictly controlled during this phase to avoid premature breakdown.
Once you can handle target loads and distances on flat surfaces, integrate the specific conditions of your planned events. Introduce rolling hills, rocky single-track trails, dirt paths, variable weather, and task-specific boots. Add these variables gradually rather than testing them all during a single hard session.
To support progressive overload, plan your training around dedicated strength, fitness and body composition blocks that prioritize sustainable adaptation over quick exhaustion.
A practical progression model should also incorporate planned consolidation periods. After two to three weeks of progressive exposure, schedule an easier consolidation week. Keep the load and distance at a previously mastered benchmark to allow bone remodeling and connective tissue recovery before advancing to the next training block.
Pacing dictates your metabolic efficiency and determines whether a session builds aerobic capacity or breaks down muscle tissue. Increasing your walking speed under load dramatically increases vertical ground reaction forces. Fast walking with a heavy pack requires active braking forces with every heel strike, placing significant eccentric strain on your quadriceps and anterior shin muscles.
Military safety reviews recommend maintaining walking speeds between three and four miles per hour for general training marches. Pacing should generally stay at a level where you can speak short sentences without gasping, which corresponds to roughly forty-five percent of maximal oxygen uptake on prolonged routes.
Ruck training generally falls into four clear pace categories:
Terrain dramatically alters energy expenditure and joint loading. A military metabolic model developed by the U.S. Army Research Institute of Environmental Medicine demonstrates that walking over loose sand, swamp, or mud multiplies energy cost several times compared to paved roads.
Moving uphill shifts the primary workload to your cardiovascular system, glutes, hamstrings, and calves while reducing downward joint impact. In contrast, descending hills decreases cardiovascular demand but substantially increases eccentric quadriceps loading and knee joint compression. When moving downhill with a heavy pack, shorten your stride, keep your knees slightly bent, and avoid slamming your heels into the ground.
Ruck training places unique demands on your body, but you should not rely on loaded walking alone to build your physical foundation. Carrying a pack exposes structural weaknesses in your hips, core, and upper back. A well-rounded regimen combines specific load-carriage sessions with dedicated resistance training and non-impact aerobic work.
The Centers for Disease Control and Prevention recommends that adults perform at least 150 minutes of moderate-intensity aerobic exercise and two full-body strength sessions each week. When combined with load carriage, strength training builds the bone density, tendon stiffness, and muscle capacity needed to carry weight safely.
Target the primary muscle groups that support load carriage:
Program your weekly schedule to avoid stacking heavy lower-extremity workouts on consecutive days. Army safety guidelines specifically advise against scheduling intense lower-body strength sessions, hard running workouts, and long loaded marches on back-to-back days. Your connective tissues need at least forty-eight hours between high-impact sessions to recover and adapt.
To structure your weekly routine effectively, read our guide on training and performance variables to learn how to balance volume and recovery without overtraining.
A balanced weekly training template might include:
Foot blisters are the most common injury in load carriage. They are not minor annoyances. Blisters alter your gait, cause compensatory joint stress, reduce movement efficiency, and can easily develop into debilitating bacterial infections if skin barriers break down.
Blisters form when friction, heat, and moisture combine to separate the outer epidermal layers from underlying tissue. The idea that you must simply tear up your feet to build tough calluses is incorrect. Heavy calluses actually increase deep shearing forces across your skin, raising the risk of severe sub-callosal blisters. Foot conditioning comes from gradual exposure, proper fit, and moisture management.
Implement these practical strategies to maintain foot health:
Footwear should always be matched to your operating surface. Lightweight trail-running shoes work well on groomed dirt paths and pavement. Supportive, high-top field boots are better suited for rocky terrain, muddy off-trail navigation, heavy tactical loads, and cold weather.
Load carriage demands substantial energy, often burning between 400 and 700 calories per hour depending on body weight, pack load, pace, and elevation change. Under-fueling leads to central fatigue, loss of focus, posture breakdown, and increased injury risk late in your workout.
For sessions lasting longer than sixty minutes, the American College of Sports Medicine recommends consuming 30 to 60 grams of easily digestible carbohydrates per hour to maintain blood glucose and delay muscular fatigue. Army operational nutrition guidance similarly advises taking in small carbohydrate snacks during prolonged marches. Use simple foods like fruit purees, chews, energy bars, or sports drinks that are easy to digest while walking.
Hydration requires a measured approach rather than drinking as much fluid as possible. The goal is to prevent excessive dehydration, defined by sports medicine guidelines as losing more than two percent of baseline body mass, while avoiding the dangers of water intoxication.
Drinking excessive amounts of plain water without electrolytes can dilute blood sodium levels, leading to exercise-associated hyponatremia. This dangerous condition causes confusion, nausea, severe swelling, and muscle weakness.
Follow these hydration guidelines:
For detailed strategies on physical restoration, read our resource on sleep, stress and resilience to optimize your daily recovery habits.
Every individual comes to ruck training with a distinct athletic background, structural strengths, and physical limitations. Applying a single generic training plan without adjusting for your personal training history increases the risk of injury.
Use these practical case profiles to tailor your training:
If you have a solid routine of walking 30 to 45 minutes daily but have never carried a weighted pack, your cardiovascular baseline is ready for light loading. However, your feet, spinal erectors, and hip stabilizers need gradual conditioning. Start with ten to twelve pounds on flat, paved routes for no more than two to three miles. Keep your pace conversational and focus entirely on pack adjustment, posture, and footwear comfort before adding weight.
If you can squat and deadlift heavy weights, your spinal column and leg muscles are accustomed to high compressive forces. However, gym strength does not build the foot conditioning or aerobic economy needed for long marches. Avoid the temptation to grab a fifty-pound pack right away. Start with a moderate twenty-pound pack and build up your continuous walking time to ninety minutes before increasing pack mass.
If you run twenty to forty miles per week, you have excellent aerobic capacity and cardiovascular endurance. However, running does not condition your upper back, shoulders, and core to support sustained vertical loads. When introducing rucking, reduce your weekly running mileage by twenty percent to prevent chronic Achilles and calf overload. Start with a light fifteen-pound pack and focus on building upper-back and trunk stamina.
If you need to meet a specific military or law enforcement standard, such as a twelve-mile march with forty-five pounds in under three hours, plan your progression over twelve to twenty-four weeks. Separate your distance workouts from your heavy-load workouts during early phases. Introduce target weights, operational footwear, and timed pacing requirements only during the final specific training phase.
Sustainable progress depends on how well you manage recovery between loaded sessions. Pushing through sharp, focal pain under the assumption that toughness overcomes tissue damage often turns minor microtrauma into long-term injuries like femoral neck or tibial stress fractures.
Research from military medical centers confirms that poor sleep quality and chronic sleep deprivation significantly increase musculoskeletal injury rates in tactical populations. Treat sleep, recovery, and volume management as essential parts of your training plan.
Use this simple traffic-light system to assess your readiness before each session:
If you are returning from an injury or illness, review our articles on recovery and sleep to rebuild your physical baseline systematically.
Take localized bone pain seriously. Unlike muscle soreness that spreads across a broad muscle belly, bone stress injuries usually present as sharp, pinpoint pain that worsens with every step. Identifying and resting these issues early prevents minor bone strain from turning into a complete fracture.
For most trainees, one dedicated load-carriage session every seven to fourteen days is enough to build and maintain capability when combined with regular strength and aerobic training. Highly conditioned individuals or tactical athletes preparing for specific field events can progress to two sessions per week, provided one session remains short and light.
Rucking provides a unique blend of cardiovascular conditioning and muscular endurance while producing lower peak joint impact forces than running. It strengthens the hips, glutes, core, and upper back under load, making it an excellent choice for individuals who want low-impact outdoor conditioning without the joint pounding of running.
You can start with a standard daypack using light weights between ten and fifteen pounds. However, as you progress to heavier loads, standard bookbags lack the structural frame, heavy-duty hip belt, and harness padding needed to transfer weight onto your pelvis safely. Invest in a dedicated pack with an internal frame and padded hip belt once you carry more than twenty pounds.
Numbness, tingling, or weakness in your hands and fingers is usually caused by excessive shoulder strap pressure on the brachial plexus, a condition known as rucksack palsy. If you experience tingling, loosen your shoulder straps, tighten your hip belt to shift the pack weight onto your pelvis, and use your sternum strap to reposition the harness away from your nerve pathways.
Individual health assessments, injury evaluations, and medical clearances should always be discussed with a qualified healthcare professional before beginning any new load-carriage or high-intensity exercise program.
Building reliable load-carrying capability requires consistent, measured effort and disciplined progression rather than reckless intensity.
Follow BattleVet for practical guidance on military and veteran health, strength, recovery, testosterone, sleep and healthy aging. Stay connected for new articles, research backed insights and clear information to help you stay capable for the years ahead.


Build better habits around strength, recovery, sleep, hormones and healthy aging with practical guidance for active military personnel and veterans.
Explore BattleVet