
Physical Recovery After Prolonged Equipment Use: Mobility, Skin, and Load Management

While passive rest seems sufficient, recovering from heavy tactical gear demands active joint mobility, deliberate skin protection, and smart load management.

Share
White Reddit alien mascot face icon on transparent background.White paper airplane icon on transparent background.White stylized X logo on black background, representing the brand X/Twitter.
August 19, 2026
Recovery and physical restoration

You unbuckle the chest rig, unlace the heavy boots, and peel off the damp base layer after twelve hours on your feet. Deep red indentations mark your shoulders and hips, your neck resists turning to the left, and your lower back feels compressed into a solid block. A brief shower washes off the salt, but the deep tissue fatigue and restricted joint motion linger well into the next morning.

Recovery from restrictive or load-bearing equipment requires a systematic approach that addresses skin integrity, joint mobility, thermal regulation, and progressive workload management rather than relying on passive rest alone.

Restoring physical function after extended time in body armor, respirators, heavy packs, or protective suits means offloading compressed tissues, actively restoring joint excursion, repairing the skin barrier, and progressively reconditioning the body to tolerate operational demands.

Understanding the Multi-Dimensional Burden of Restrictive Equipment

Recovering from heavy or restrictive gear is rarely just a matter of relieving muscle soreness. When you wear protective equipment for extended periods, your body encounters several distinct physical stressors simultaneously. Treating equipment recovery as a single issue leads to incomplete rehabilitation and repeated injuries.

  • THE 5-LOAD EQUIPMENT FRAMEWORK
  • 1. External Load Mass of the gear, armor, tools, and pack
  • 2. Interface Load Contact pressure, friction, and shear forces
  • 3. Postural Load Muscular effort to balance altered alignment
  • 4. Movement Load Energy cost of walking, bending, or climbing
  • 5. Thermal Load Heat and sweat trapped by impermeable layers

The Physics of Equipment Loading

Physical load consists of more than the number of pounds registered on a scale. To manage recovery, you must evaluate five interconnected types of loading:

  • External load: The absolute weight of the equipment, plates, carried gear, or protective layers.
  • Interface load: The direct mechanical force delivered across contact points such as the collarbones, iliac crests, forehead, nasal bridge, or feet.
  • Postural load: The sustained muscular contraction required to keep the spine, neck, and hips stable under an uneven or shifting center of gravity.
  • Movement load: The increased metabolic and mechanical cost of performing basic tasks like walking, kneeling, reaching, or climbing while your joints are mechanically constrained.
  • Thermal load: The internal heat retained when non-breathable fabrics or thick ballistic plates block the body from sweating and cooling naturally.

When these factors combine across consecutive days, they produce cumulative strain. Even relatively light gear can cause significant tissue damage if the interface pressure is concentrated over a narrow area or if trapped heat softens the skin.

Pressure, Friction, and Shear Mechanics

Tissue breakdown happens through three primary mechanical forces. Pressure occurs when weight is focused onto a small surface area, compressing the tiny blood vessels that feed the skin and underlying muscle. Friction develops when equipment slides against the skin, wearing down the outer protective layer.

Shear represents the most damaging force. Shear happens when your deep skeletal structure moves in one direction while the outer skin remains pinned against a rigid strap, plate, or harness. This opposing motion stretches and tears microvascular structures beneath the surface, cutting off blood supply to deeper tissues. International clinical guidelines from the National Pressure Injury Advisory Panel emphasize that minimizing shear is just as important as reducing direct pressure.

Skin Breakdown Patterns Under Protective Enclosures

Protective equipment creates a hostile microclimate against the body. When sweat cannot evaporate, the skin absorbs excess fluid and becomes macerated. Macerated skin turns white, soft, and fragile, losing its natural resistance to friction and tearing.

Under these conditions, service members and tactical athletes frequently experience several distinct skin complications:

  • Transient erythema: Temporary redness that fades quickly once the pressure source is removed.
  • Non-blanching erythema: Persistent deep red or purple discoloration that does not turn white when pressed, signaling capillary damage beneath the surface.
  • Maceration and excoriation: Softened, peeling, or abraded skin caused by the combination of trapped moisture and constant rubbing.
  • Irritant contact dermatitis: Localized inflammation driven by trapped sweat, salts, adhesives, or repeated scrubbing.
  • Allergic contact dermatitis: An immune reaction to specific chemicals, dyes, rubbers, or treated fabrics in the equipment.
  • Pressure injuries: Localized damage to the skin and deeper tissue, typically over a bony prominence, caused by sustained pressure or pressure combined with shear.

Peer-reviewed studies on personal protective equipment demonstrate that prolonged use regularly causes acute dermatitis, deep pressure injuries, and secondary fungal or bacterial infections. Managing these skin issues requires immediate attention after gear removal rather than waiting for an open wound to form.

Skin Inspection, Cleansing, and Barrier Restoration

Protecting the skin barrier requires an active, structured maintenance routine. The skin is your first line of defense against infection and mechanical trauma, and a minor hot spot can quickly degrade operational readiness.

  • SKIN TRIAGE DECISION LADDER
  • Level 1: Mild & Transient Redness clears in 30 min; no pain.
  • Action: Clean, dry, monitor.
  • Level 2: Caution Needed Redness lingers; tender to the touch.
  • Action: Offload, apply barrier cream.
  • Level 3: Clinical Attention Non-blanching, blistered, or numb.
  • Action: Stop use; medical evaluation.

Systematic Post-Removal Skin Checks

Inspect your skin immediately after removing equipment, and check it again several hours later. Some pressure injuries do not show their true severity until blood flow returns to the compressed tissue and localized swelling develops.

Focus your inspection on high-risk contact zones:

  • The bridge of the nose, cheeks, and behind the ears after wearing respirators, masks, or eye protection.
  • The forehead and base of the skull after wearing helmets or head-mounted optics.
  • The clavicles, top of the shoulders, and scapular ridges after wearing plate carriers or heavy packs.
  • The iliac crests, lower lumbar spine, and sacrum after wearing duty belts or rucksacks.
  • The groin and upper thighs after wearing safety harnesses or tactical sub-belts.
  • The heels, Achilles tendons, and balls of the feet after wearing rigid boots.

Look for changes in skin color, localized swelling, warm patches, firmness, or broken skin. Check for sensory changes such as numbness or tingling, which often indicate that a strap or pad has compressed a superficial nerve.

Cleansing and Barrier Support Protocols

Once equipment is off, cleanse the skin using lukewarm water and a gentle, fragrance-free cleanser. Aggressive scrubbing with harsh antibacterial soaps strips essential lipids from the skin barrier, increasing your vulnerability to friction and chemical irritation.

Pat the skin dry with a clean towel instead of rubbing it vigorously. Allow the skin to dry completely in open air before applying any protective products or putting clothing back on.

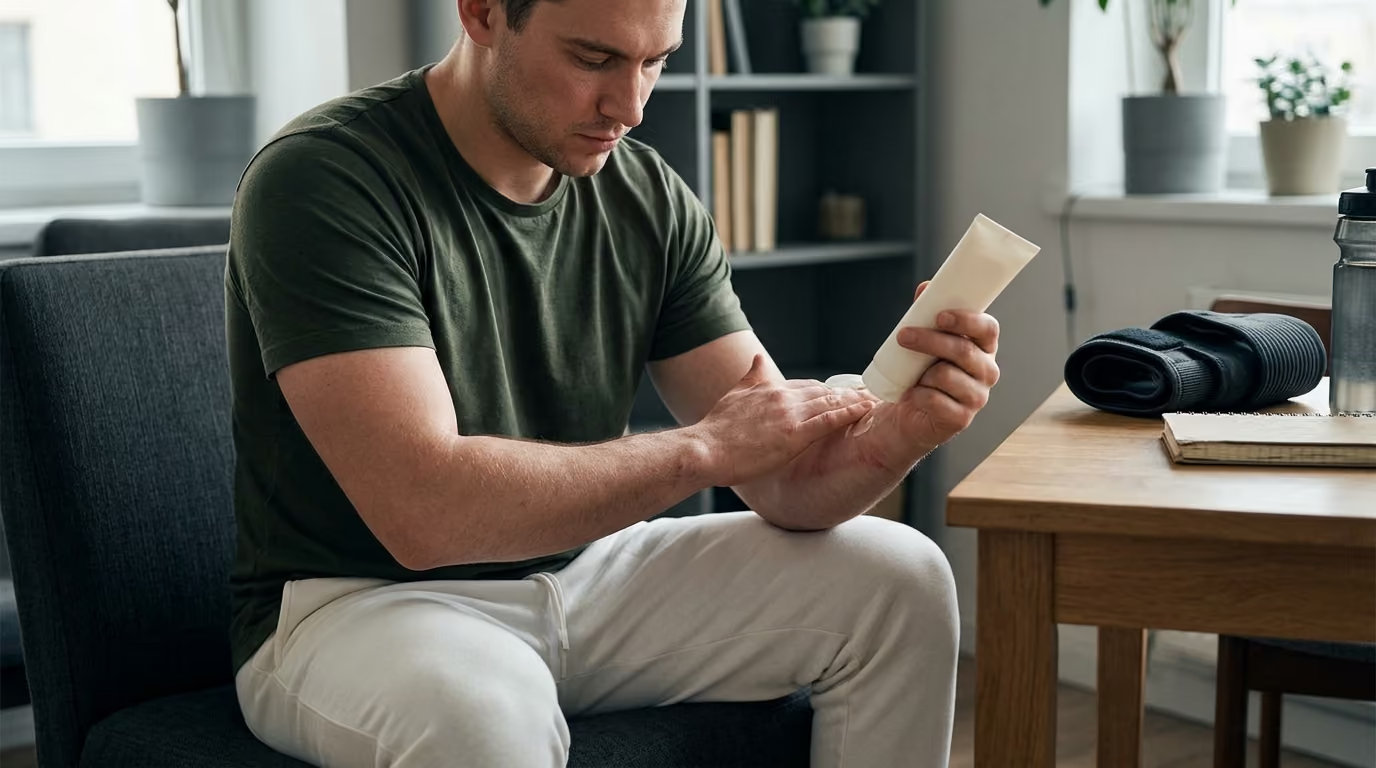
If the skin is intact but prone to chafing, apply a thin layer of a dimethicone-based barrier cream or medical-grade petroleum ointment to reduce friction. For areas subject to heavy friction or minor pressure, consider applying a thin hydrocolloid or breathable silicone dressing. Never place loose dressings, thick ointments, or unauthorized padding over areas where a tight seal is required, such as the contact border of a chemical or particulate respirator.

Equipment Hygiene and Fit Corrections

Your recovery routine must extend to the gear itself. Salt, sweat, and environmental grit dry into stiff, abrasive crystals on the inner padding and straps of body armor and harnesses.

Clean your equipment according to manufacturer specifications after heavy use. Replace compressed, hardened, or degraded padding promptly. A foam pad that has lost its rebound transfers raw mechanical pressure straight into your tissue.

Evaluate equipment fit while moving, not just while standing motionless in front of a mirror. Gear that feels secure while stationary often shifts, pinches, or restricts breathing when you squat, crawl, or reach overhead. Proper fit distributes pressure across broad, muscular surfaces and keeps rigid edges away from vulnerable bony landmarks.

Mobility Restoration and Joint Decompression

Prolonged equipment use locks the body into sustained, rigid postures. Heavy helmets force the cervical spine into extension or forward-head positioning, while body armor and chest rigs restrict normal thoracic rotation and rib cage expansion.

  • JOINT DECOMPRESSION SEQUENCE (5 MIN)
  • 1. Cervical Retractions 8-10 reps Neutralizes helmet load
  • 2. Thoracic Extension/Rot. 8 reps/side Restores rib mobility
  • 3. Scapular Wall Slides 10 reps Unloads upper traps
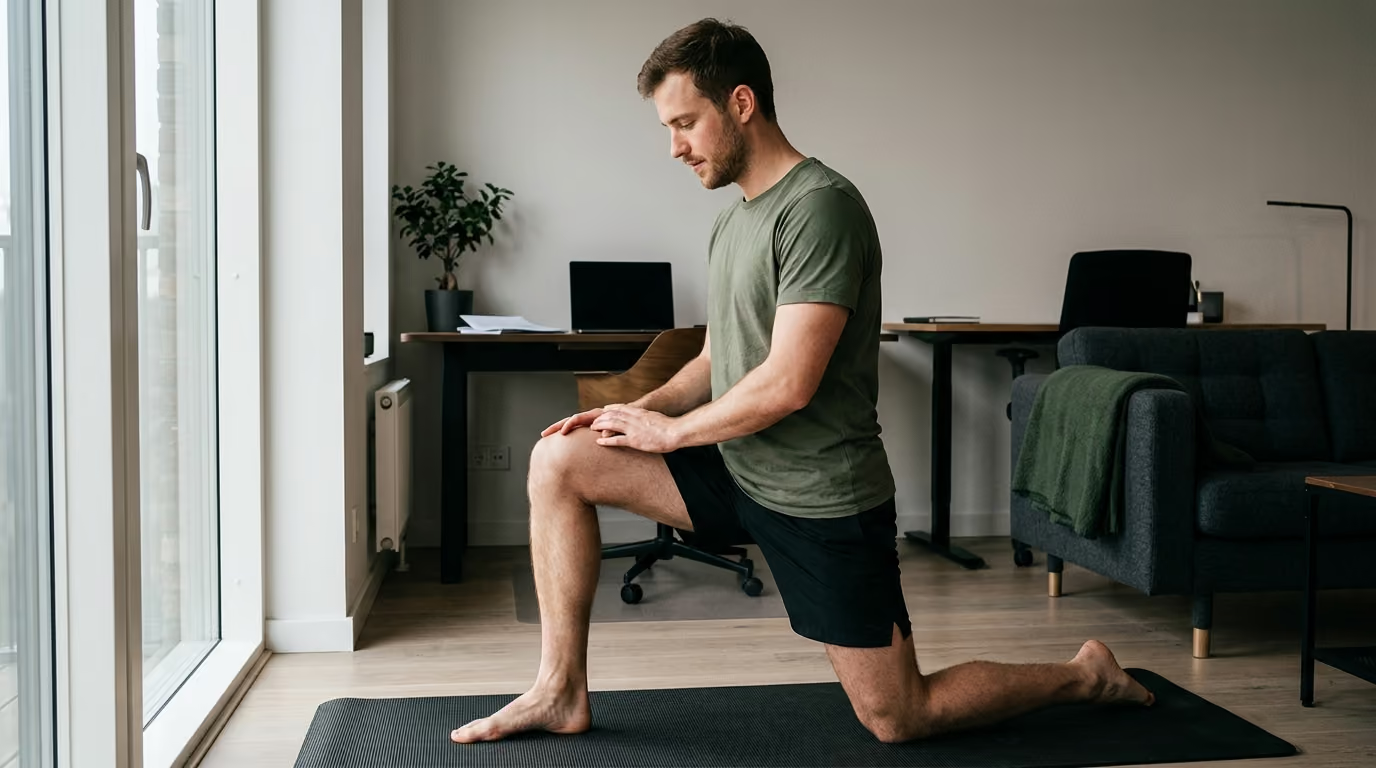
  • 4. Half-Kneeling Hip Flex. 30 sec/side Relieves belt strain
  • 5. Ankle Dorsiflexion 10 reps/leg Restores boot mechanics

The Biology of Equipment-Induced Stiffness

When you spend hours inside restrictive gear, your nervous system increases baseline muscle tone to stabilize the added mass. Over time, the joint capsule and surrounding connective tissues temporarily adapt to this shortened range of motion.

Physical therapists categorize motion loss into distinct categories:

  • Post-use stiffness: A temporary loss of joint excursion that resolves quickly with gentle, active movement.
  • Pain-limited motion: Muscle guarding caused by acute tissue irritation, tendon strain, or ligament stress.
  • Mechanical restriction: Physical blockage caused by localized soft-tissue swelling or poorly fitted equipment.
  • Contracture: Structural shortening of connective tissues resulting from long periods of continuous immobilization.

Recognizing these differences is critical. Forcing a joint into deep stretches when the limitation is driven by inflammation or nerve irritation will aggravate the issue. Mobility work should be smooth, active, and strictly pain-free.

Targeted Joint Decompression Routines

Perform a brief decompression sequence immediately after removing restrictive gear. These active movements encourage blood flow, normalize resting muscle tone, and restore healthy joint lubrication.

Cervical Spine and Neck

  1. Cervical retractions: Sit tall with your shoulders relaxed. Gently draw your chin straight back, making a double chin, without tilting your head up or down. Hold for two seconds, return to the start, and complete eight to ten controlled repetitions.
  2. Controlled neck rotations: Slowly turn your head to look over your left shoulder until you meet gentle resistance. Pause for one second, then slowly sweep your gaze across to the right shoulder. Perform five slow rotations per side.

Thoracic Spine and Scapulae

  1. Thoracic extension over a roller: Lie on your back with a foam roller positioned horizontally across your mid-back. Support your head with your hands, keep your hips flat on the floor, and gently extend your upper spine backward over the roller. Exhale fully at the bottom of the movement, then return to neutral. Perform six to eight controlled repetitions, adjusting the roller slightly higher or lower across the upper back.
  2. Scapular wall slides: Stand with your back, head, and elbows flat against a wall. Slowly slide your arms upward into a "Y" position while keeping your forearms in light contact with the wall. Lower down under control, focusing on pulling your shoulder blades downward and back. Complete ten repetitions.

Hips, Pelvis, and Lower Spine

  1. Half-kneeling hip flexor glide: Place one knee on a padded surface with the opposite foot forward, forming two 90-degree angles. Tuck your pelvis slightly underneath you to flatten your lower back, then shift your body weight forward an inch or two until you feel a gentle stretch along the front of the trailing hip. Hold for thirty seconds per side while breathing deeply into your belly.
  2. Cat-cow spinal waves: Position yourself on all fours with your hands under your shoulders and knees under your hips. On an exhale, round your entire spine toward the ceiling, tucking your tailbone and dropping your head. On an inhale, reverse the motion by lifting your chest and allowing your stomach to sink toward the floor. Move smoothly through eight to ten full breathing cycles.

Explore our dedicated guide on active recovery protocols and methods to learn how gentle movement routines speed up tissue repair between hard physical shifts.

Progressive Reconditioning Beyond Flexibility

Gaining full range of motion after taking off your gear does not mean your physical capacity is fully restored. Stretching alone will not prepare your muscles, tendons, and cardiovascular system to carry heavy operational loads again safely.

  • 5-STAGE GRADED LOAD EXPOSURE LADDER
  • Stage 1: Unloaded Active Movement (Bodyweight, walking, ROM)
  • Stage 2: Partial Load (Light plate carrier, reduced belt kit)
  • Stage 3: Full Equipment, Low-Demand (Standing, flat walking)
  • Stage 4: Moderate Task Exposure (Stairs, lifting, crouching)
  • Stage 5: Full Operational Simulation (Full gear, speed, terrain)

Lessons from Bed Rest and Immobilization Science

Research into prolonged physical restriction reveals how rapidly human physiology declines without normal loading patterns. Clinical bed-rest studies demonstrate that even short periods of restricted movement reduce stroke volume, decrease cardiac output, diminish capillary density in skeletal muscle, and impair upright blood pressure regulation.

In long-term aerospace bed-rest trials, researchers discovered that two weeks of intensive reconditioning was insufficient to restore deep trunk and spinal stabilizing muscles to their baseline volume and composition. When your torso is immobilized inside rigid armor or heavy belts, your deep postural muscles stop working dynamically. If you jump straight back into heavy training without progressive loading, you risk overloading your spinal discs and peripheral joints.

To build long-term durability, you must develop a foundation of strength. Review our principles for strength and body composition training to ensure your muscular structure can easily handle external loads.

The Five-Stage Graded Load Ladder

When returning to full duty after time off, injury, or an extended period of light duty, rebuild your capacity systematically across five distinct stages:

Stage 1: Unloaded Active Movement

Restore full, painless joint range of motion and baseline cardiovascular endurance through walking, cycling, and bodyweight movements without any equipment. Verify that your joints move freely and your baseline stamina is intact before adding external mass.

Stage 2: Partial Load

Introduce basic equipment components or scaled-down weight for short durations. For instance, wear an unloaded plate carrier or a lightweight duty belt during standard bodyweight exercises and short, flat walks.

Stage 3: Full Equipment, Low-Demand Tasks

Wear your complete operational kit during low-intensity, controlled conditions. Walk on flat, even terrain for twenty to thirty minutes, monitoring your skin for pressure points and checking your posture for compensation patterns.

Stage 4: Moderate Task Exposure

Incorporate task-specific movements while wearing full gear. Add stair climbs, short hill walks, kneeling transitions, lifting drills, and upper-body reaching tasks. Keep the overall duration moderate to manage fatigue.

Stage 5: Full Operational Simulation

Reintroduce complex variables including extended duration, unpredictable terrain, high ambient temperatures, and maximum physical exertion. Change only one variable at a time so you can accurately identify what causes physical strain if symptoms emerge.

Load Management and Exposure Tracking

Physical durability is governed by the balance between total workload and recovery capacity. Tracking your equipment exposures helps you prevent overuse injuries, systemic fatigue, and chronic joint degeneration.

  • LOAD PROGRESSION: ONE VARIABLE RULE
  • Current Baseline: 30-Minute Walk 20 lb Armor Flat Terrain
  • Correct Progression: Adjust ONLY ONE Factor
  • Option A (Duration): 45-Minute Walk 20 lb Armor Flat
  • Option B (Load): 30-Minute Walk 30 lb Armor Flat
  • Option C (Terrain): 30-Minute Walk 20 lb Armor Hills
  • Incorrect Progression: Adjusting Multiple Factors Simultaneously
  • DANGEROUS: 45-Minute Walk 30 lb Armor Hills High Heat

The Acute-to-Chronic Workload Principle

Injuries frequently happen when your acute workload (the physical demands placed on your body this week) vastly exceeds your chronic workload (the average demands your body has adapted to over the previous four to six weeks).

When wearing heavy equipment, this ratio is easily distorted. If you spend three weeks doing light office or administrative work and then suddenly jump into a continuous forty-hour field exercise wearing sixty pounds of gear, your acute-to-chronic workload spikes dangerously. Your muscles, tendons, and skin cannot adapt quickly enough to that sudden increase in interface pressure and shear.

To manage this risk, structure your training so your weekly equipment exposure increases gradually, ideally by no more than ten to fifteen percent per week.

The Single-Variable Rule in Training

When progressing your physical capacity under gear, modify only one major operational variable at a time:

  • Equipment mass or load distribution.
  • Duration of wear.
  • Movement speed or movement complexity.
  • Environmental heat and humidity.
  • Terrain difficulty (flat pavement versus loose rock or steep inclines).

If you increase your rucksack weight from thirty-five pounds to fifty pounds while simultaneously doubling your distance and hiking in ninety-degree heat, you cannot pinpoint what caused the resulting injury. Isolate your variables to systematically build tolerance without overwhelming your body.

For a deeper dive into balancing mission readiness and athletic performance, explore our collection of military health and operational fitness articles.

Objective Recovery Markers

Do not rely on motivation or pain tolerance to determine whether you have recovered from heavy equipment use. Track objective recovery markers to assess your true physiological status:

  • Resting heart rate and recovery metrics: Monitor your waking pulse or heart rate variability. A sustained spike in resting heart rate often indicates systemic fatigue or incomplete recovery.
  • Next-day functional movement: Test basic movements such as an unweighted deep squat, toe touch, and overhead reach each morning. Lingering restriction points to unresolved tissue inflammation.
  • Skin recovery status: Check whether pressure marks and redness from the previous day have completely cleared before putting your gear back on.
  • Body weight change: Track morning body weight after working in hot environments. A rapid drop of more than 1.5% of your baseline body weight indicates persistent fluid deficits that compromise muscle function and skin elasticity.

Heat, Moisture, and Hydration Dynamics

Thermal strain compounds every mechanical stress that equipment places on the body. Understanding how heat, sweat, and fabric interact is vital for protecting both your skin and your vital organs.

  • THERMAL RECOVERY ESSENTIALS
  • 1. Rapid Offloading Remove non-breathable layers immediately
  • 2. Active Cooling Rest in shaded, air-conditioned areas
  • 3. Structured Fluids Sip 150-250 ml cool water every 15-20 min
  • 4. Electrolyte Balance Add balanced sodium/potassium in heat
  • 5. Fluid Limit Check Never exceed 1.5 liters (6 cups) per hour

The Microclimate Under Sealed Gear

Your body relies on the evaporation of sweat to regulate its core temperature. When you wear multilayer ballistic armor, chemical protective suits, or heavy leather turnout gear, the sweat cannot evaporate into the atmosphere.

Instead, the air trapped between your skin and your gear rapidly reaches one hundred percent relative humidity. Once the surrounding air is saturated, further sweating provides zero cooling benefit.

This trapped sweat pools against the skin, raising local skin temperature, softening the epidermis, and washing away natural protective oils. This turns normal contact zones into high-friction danger areas.

Hydration and Cooling Standards

Thirst is a delayed physiological signal. By the time you feel noticeably thirsty in hot, humid conditions, you may already be dehydrated enough to impair your cognitive speed, physical stamina, and tissue perfusion.

Occupational health guidelines from OSHA and EU-OSHA establish clear parameters for fluid replacement during demanding work in warm environments:

  • Drink small amounts of cool water frequently, approximately one cup (eight ounces) every fifteen to twenty minutes, rather than drinking massive quantities all at once.
  • Do not consume more than forty-eight ounces (1.5 quarts) of fluid within a single hour. Drinking excessive plain water without electrolytes can dilute blood sodium levels, leading to exercise-associated hyponatremia, a potentially life-threatening medical emergency.
  • Use balanced electrolyte solutions containing sodium, potassium, and carbohydrates when you are sweating heavily for more than two continuous hours.
  • Rest in shaded, well-ventilated, or air-conditioned environments whenever operational conditions allow.

Recognizing Thermal Illness

You must distinguish between ordinary physical fatigue and the progressive stages of heat illness.

  • HEAT ILLNESS SEVERITY SPECTRUM
  • Heat Exhaustion: Heavy sweat, cool/pale skin, headache, nausea.
  • Action: Move to shade, loosen gear, drink fluids, cool down.
  • Heat Stroke: Hot/red skin, confusion, staggering, vomiting.
  • EMERGENCY: Call 911 immediately. Strip gear. Rapid cooling.

Heat Exhaustion Signs

  • Heavy sweating accompanied by pale, cool, or clammy skin.
  • A weak, rapid pulse.
  • Dizziness, lightheadedness, or nausea.
  • Muscle cramps and persistent headache.

If these signs appear, immediately move the individual to a cool or shaded area, remove all heavy and restrictive equipment, loosen tight clothing, apply cool, wet towels to the neck and torso, and provide small sips of cool water.

Heat Stroke Signs (Medical Emergency)

  • Core body temperature rising above 104 degrees Fahrenheit (40 degrees Celsius).
  • Altered mental status, confusion, slurred speech, irrational behavior, or loss of consciousness.
  • Staggering, severe loss of coordination, or seizures.
  • Hot, flushed skin (which may be either completely dry or heavily sweating depending on circumstances).

Heat stroke is an immediate, life-threatening emergency. Call emergency medical services without delay. Strip off all equipment and clothing immediately and begin aggressive whole-body cooling using cold-water immersion, ice packs applied to the neck, armpits, and groin, or continuous cool-water misting combined with fanning.

Learn more about full-body physical restoration and nervous system management in our library of sleep, stress, and physical resilience resources.

Special Circumstances and Vulnerable Populations

Certain physiological factors and individual health conditions significantly alter how the body responds to restrictive equipment. Recognizing these edge cases allows you to make smart adjustments before tissue damage occurs.

Neuropathy and Sensory Impairments

Individuals with diabetic peripheral neuropathy, nerve entrapment syndromes, or localized sensory deficits cannot rely on normal pain signals to warn them of tissue damage. A strap that feels mildly snug to someone with reduced sensation may actually be cutting off capillary blood flow.

If you have reduced sensation in your hands, feet, or torso, you must rely on visual inspections rather than discomfort. Perform thorough skin checks using mirrors or assistance from a colleague every time you remove your gear.

Edema and Fluid Shifts

Limb circumference naturally changes throughout an operational shift. Prolonged standing, intense physical exertion in hot weather, and gravitational pooling cause fluid to accumulate in the lower legs, feet, and hands.

Gear that fits perfectly at six o'clock in the morning can become dangerously tight by mid-afternoon. If your boots, gloves, or lower leg guards become restrictive as swelling develops, adjust the laces or straps to maintain proper blood flow. Never ignore a sudden throbbing sensation or color change in your fingers or toes.

Prior Pressure Injuries and Scar Tissue

Scar tissue from previous surgeries, lacerations, or deep pressure injuries lacks the elasticity and blood supply of healthy, undamaged skin. It breaks down much faster when subjected to friction and pressure.

Avoid running equipment straps, rigid seams, or heavy buckles directly across old surgical scars or bony prominences that have previously sustained pressure ulcers. If contact is unavoidable, use specialized interface padding to distribute forces across surrounding healthy tissue.

Practical Recovery Routines for Common Equipment Scenarios

Apply these targeted recovery protocols based on the specific type of equipment you wear during daily operations.

Plate Carriers and Body Armor

  • ARMOR RECOVERY PROTOCOL (10 MINUTES)
  • 1. Unload & Strip Remove carrier; dry skin with towel.
  • 2. Inspect Shoulders Check clavicles and scapulae for marks.
  • 3. Decompress Thorax Perform 8 thoracic extensions on roller.
  • 4. Scapular Mobilization Complete 10 wall slides; stretch chest.
  • 5. Deep Diaphragm Reset 2 minutes of relaxed belly breathing.
  1. Immediate action: Remove the carrier immediately upon entering a secure, temperature-controlled environment. Peel off the damp base layer and pat the skin dry.
  2. Skin check: Inspect the tops of both shoulders, the clavicles, the spine of the scapulae, and the iliac crests for persistent red marks or bruising.
  3. Thoracic decompression: Perform eight thoracic extensions over a foam roller, followed by ten scapular wall slides to reverse shoulder rounding.
  4. Breathing reset: Lie on your back with your knees bent, placing one hand on your chest and one hand on your abdomen. Practice slow, diaphragmatic breathing for two minutes, expanding your lower rib cage fully to relieve tension in your accessory neck breathing muscles.

Combat Helmets, Night Vision Mounts, and Heavy Headgear

  1. Immediate action: Unbuckle the retention harness and remove the helmet. Wipe sweat away from the forehead, temple lines, and base of the skull.
  2. Skin check: Examine the forehead and occipital bone for deep indentations, persistent redness, or localized tenderness.
  3. Cervical decompression: Perform ten slow cervical retractions (chin tucks), followed by five gentle neck rotations in each direction.
  4. Suboccipital release: Lie flat on your back and place two lacrosse balls taped together beneath the base of your skull. Allow the weight of your head to rest gently on the balls for sixty to ninety seconds while breathing deeply to release tight neck extensors.

Chemical Protective Suits and Impermeable Gear

  1. Immediate action: Following proper decontamination and removal procedures, move directly to a cool, shaded recovery area.
  2. Thermal and fluid management: Drink cool water or an electrolyte beverage in small sips. Monitor yourself for signs of heat illness.
  3. Skin restoration: Wash thoroughly with lukewarm water and a mild, non-drying soap. Dry your skin completely, paying close attention to skin folds, underarms, and the groin. Apply a light moisturizing lotion to restore hydration to the skin barrier.

Industrial Fall-Arrest Harnesses and Heavy Duty Belts

  1. Immediate action: Loosen leg straps and remove the harness or duty belt as soon as you step off the elevated work platform or complete the task.
  2. Skin check: Inspect the groin, upper inner thighs, and waistline for signs of pinching, chafing, or shear-induced blistering.
  3. Pelvic and hip reset: Perform a half-kneeling hip flexor stretch for thirty seconds per leg, followed by eight slow cat-cow movements on hands and knees to decompress the lumbar spine and pelvic joints.

Evidence Review: Scientific Realities Versus Speculation

When building an effective equipment recovery protocol, you must separate established clinical facts from unproven trends and marketing claims.

  • EVIDENCE SUMMARY MATRIX
  • ESTABLISHED SCIENCE UNCERTAIN / EARLY RESEARCH
  • Frequent pressure offloading - Percussion massage guns
  • Microclimate moisture control - Targeted compression wear
  • Progressive load reconditioning - Prophylactic hydrocolloids
  • Structured hydration & cooling under tight-fitting masks

Established Scientific Principles

  • Interface pressure offloading: Clinical pressure-injury guidelines consistently prove that relieving pressure and shear at regular intervals prevents tissue necrosis and capillary collapse.
  • Microclimate management: Strong evidence shows that excess moisture, heat, and friction break down the skin's stratum corneum, significantly increasing the rate of dermatitis and pressure ulcers.
  • Progressive reconditioning: Decades of physical rehabilitation and aerospace bed-rest research confirm that rebuilding physical capacity requires gradual, progressive overload combining aerobic and resistance training.
  • Hydration and thermal regulation: Workplace safety research demonstrates that scheduled fluid intake, active cooling, and work-rest cycles prevent severe heat-related illnesses and preserve cognitive function.

Uncertain and Emerging Concepts

  • Percussion massage guns for equipment recovery: While handheld massage guns provide short-term relief from subjective muscle soreness, peer-reviewed evidence does not support claims that they accelerate structural tissue repair or reverse joint stiffness faster than active movement.
  • Prophylactic dressings under tight respirators: Applying adhesive dressings under respirators to prevent skin damage can alter the perimeter seal. Current evidence stresses that any barrier dressing used beneath a respirator must undergo formal fit-testing to verify protection.
  • Targeted compression garments: While compression socks assist with lower-limb fluid return during long periods of standing, evidence remains mixed regarding whether upper-body compression garments speed up functional recovery after carrying heavy operational loads.

Actionable Guidance for Restoring Physical Capability

  • STEP-BY-STEP DAILY RECOVERY PLAYBOOK
  • 1. Clear Exposure Strip gear in a cool area; begin cooling.
  • 2. Screen & Wash Check high-friction zones; wash gently.
  • 3. Decompress Spine 5-minute active mobility (neck/hips/back).
  • 4. Rehydrate Right Drink 8 oz water/electrolytes every 20 min.
  • 5. Log & Adjust Note pain/redness; adjust fit before next use

Follow this straightforward, hype-free daily routine to recover efficiently from restrictive equipment use:

  1. Clear the load immediately: Strip off your equipment as soon as operational conditions allow. Move into a cool, well-ventilated space to begin lowering your core body temperature.
  2. Screen your skin and wash gently: Perform a systematic check of your high-risk contact areas. Wash away sweat and salts with lukewarm water and a gentle cleanser, then pat the skin completely dry.
  3. Execute a five-minute mobility routine: Move your neck, thoracic spine, hips, and ankles through their full, pain-free range of motion using controlled, active movements.
  4. Rehydrate systematically: Sip cool fluids containing balanced electrolytes if you have been sweating heavily for more than two hours. Keep your intake under forty-eight ounces per hour.
  5. Log recovery and adjust equipment: Check whether redness or tenderness persists into the next morning. If you notice repeated hot spots or joint stiffness, adjust your equipment straps, replace worn padding, or modify your load distribution before putting your gear back on.

Medical Disclaimer

This educational resource is published for informational purposes only and does not constitute individual medical advice, clinical diagnosis, physical therapy programming, or personalized treatment plans. Always consult a qualified healthcare professional, sports medicine physician, or licensed physical therapist regarding persistent joint pain, nerve symptoms, deep skin breakdown, suspected infection, or heat-related illness. Never disregard professional medical guidance or delay seeking care because of information contained in this guide.

Frequently Asked Questions

How long should red marks from body armor or straps take to disappear?

Normal, harmless pressure marks (transient erythema) should begin to fade within twenty to thirty minutes after removing your equipment. If a red or purple mark remains visible for hours, feels firm or warm to the touch, or does not turn white when gently pressed with a finger, deeper tissue damage has occurred. You should offload that area and have it evaluated by a medical professional.

Is it safe to stretch my neck vigorously after wearing a heavy helmet all day?

No. Aggressive, forceful neck stretching can irritate compressed cervical facet joints and strain fatigued stabilizing muscles. Instead, focus on slow, active movements such as gentle chin retractions (chin tucks) and smooth, pain-free head turns. Let your neck muscles decompress naturally without pulling on your head with your hands.

Can I put padding under my plate carrier to stop my collarbones from bruising?

Adding extra, makeshift foam padding can create new pressure ridges, raise the equipment's center of gravity, and destabilize the plate carrier. A better approach is to adjust the shoulder and cummerbund strap tensions so the weight is evenly balanced between your torso and your hips, rather than resting entirely on your collarbones. If you use commercial pads, choose low-profile, high-density designs approved by the equipment manufacturer.

What should I do if my skin develops blisters under a duty belt or harness?

Do not pop or puncture intact blisters, as the overlying skin provides a sterile, natural barrier against infection. Clean the area gently with mild soap and water, pat it dry, and protect it with a hydrocolloid dressing or non-stick sterile pad. Identify the exact strap or buckle that caused the friction and adjust its fit or position before wearing the equipment again.

When to Revisit This Resource

Review this guide whenever you transition to a new equipment setup, return to field duty after an extended break, or experience recurring skin irritation, nerve numbness, or joint stiffness after long shifts.

Consistent, proactive recovery practices protect your physical capability and keep you operating at your highest level over a long, demanding career.

Sources

  1. EU-OSHA Heat Stress Guidance for Workplaces
  2. PMC: Adverse Skin Reactions to Personal Protective Equipment
  3. Society of Tissue Viability: PPE-Related Skin Damage Review
  4. EU-OSHA Heat at Work Guidance
  5. OSHA Heat Illness Prevention Campaign
  6. OSHA Emergency Preparedness and Response: Heat Stress Guide
  7. International Wound Journal: Device-Related Pressure Injuries from PPE

Stay ready for the years ahead

Build better habits around strength, recovery, sleep, hormones and healthy aging with practical guidance for active military personnel and veterans.

Explore BattleVet