
Waking up with a stiff, locked joint after weeks in a sling requires a structured, phased rehabilitation progression to restore full mobility safely.





You wake up, swing your legs over the side of the bed, and reach for a water glass on the nightstand. Your shoulder stops abruptly halfway through the movement, tight and unresponsive after six weeks in a supportive sling. When you try to force the arm forward, a sharp ache catches in the joint capsule, and your muscles lock up in defense. That sudden wall of stiffness is a normal physical response to tissue healing and immobilization, but breaking through it requires a calculated plan rather than sheer willpower.
Restoring range of motion safely requires matching progressive mechanical stress to the biological tolerance of healing tissues rather than aggressively forcing stiff joints past their limits.
To restore range of motion safely after injury or immobilization, you must follow a structured progression that respects surgical precautions, restores low-load passive and active-assisted movement first, rebuilds neuromuscular control through progressive loading, and uses your 24-hour symptom response to guide every increase in exercise volume.
Restoring range of motion is not simply a matter of stretching harder. A stiff joint is not just a tight rubber band waiting to be pulled back to its original length. It is an altered biological environment involving healing connective tissues, sensitized nerve endings, swollen joint capsules, and inhibited muscles.
Attempting to aggressively force a joint into end-range positions often backfires. It triggers protective muscle guarding, increases local inflammation, and risks damaging repairing structural repairs.
A truly effective approach treats mobility as a progressive exposure process. You gradually introduce the specific types of stress that healing tissues can currently handle, monitor how those tissues respond over the following day, and expand your movement capacity as biological healing solidifies.
Understanding the physiological differences between structural protection, passive mobility, active motor control, and functional strength allows you to rebuild full physical capability without setbacks. You can learn more about general rehabilitation strategies across our physical restoration resources to help support your overall recovery plan.
When a joint is immobilized in a cast, brace, or sling, your body initiates a series of rapid structural and neurological adaptations. These changes begin within days of reduced movement. While immobilization protects broken bones, repaired tendons, and torn ligaments, it also creates significant collateral stiffness across surrounding healthy tissues.
Connective tissues throughout the joint capsule, ligaments, and tendons begin to lose water content and glycosaminoglycans, which are lubricating molecules that allow collagen fibers to glide smoothly over one another. Without regular movement and fluid circulation, newly laid collagen fibers form disorganized, cross-linked bridges. This process thickens the joint capsule and binds adjacent tissue layers together, creating dense adhesions that physically restrict joint translation and rotation.
Muscles immobilized in a shortened position experience accelerated atrophy and a loss of sarcomeres, which are the basic contractile units of muscle fibers. At the same time, the central nervous system alters its motor recruitment patterns to protect the perceived injury. The brain downregulates neural drive to primary mover muscles, a phenomenon known as arthrogenic muscle inhibition.
This neural shutdown prevents you from producing strong voluntary contractions even when you try. When you finally remove the immobilizing device, you are left with a joint that is mechanically stiff, physically weak, and neurologically uncoordinated.
A systematic review published in Frontiers in Physiology examined the physiological impact of human limb immobilization. The researchers concluded that segmental immobilization rapidly reduces isometric muscle strength, decreases skeletal muscle cross-sectional area, and impairs overall neuromuscular function.
This means that post-injury stiffness is never an isolated flexibility problem. It is a combined failure of joint mechanics, tissue lubrication, and nervous system signaling that must be rebuilt systematically.
To navigate rehabilitation successfully, you must distinguish between different forms of joint mobility. Measuring how far a limb can move is only meaningful when you understand how that movement is being produced and controlled.
Passive range of motion refers to movement produced entirely by an external force without any voluntary muscle contraction from the patient. This external force can come from a physical therapist, a mechanical continuous passive motion machine, gravity, a strap, or your unaffected limb.
Passive movement is primarily used in early recovery phases to gently stress healing capsules and maintain joint lubrication without placing tensile load on repaired tendons or recovering muscles.
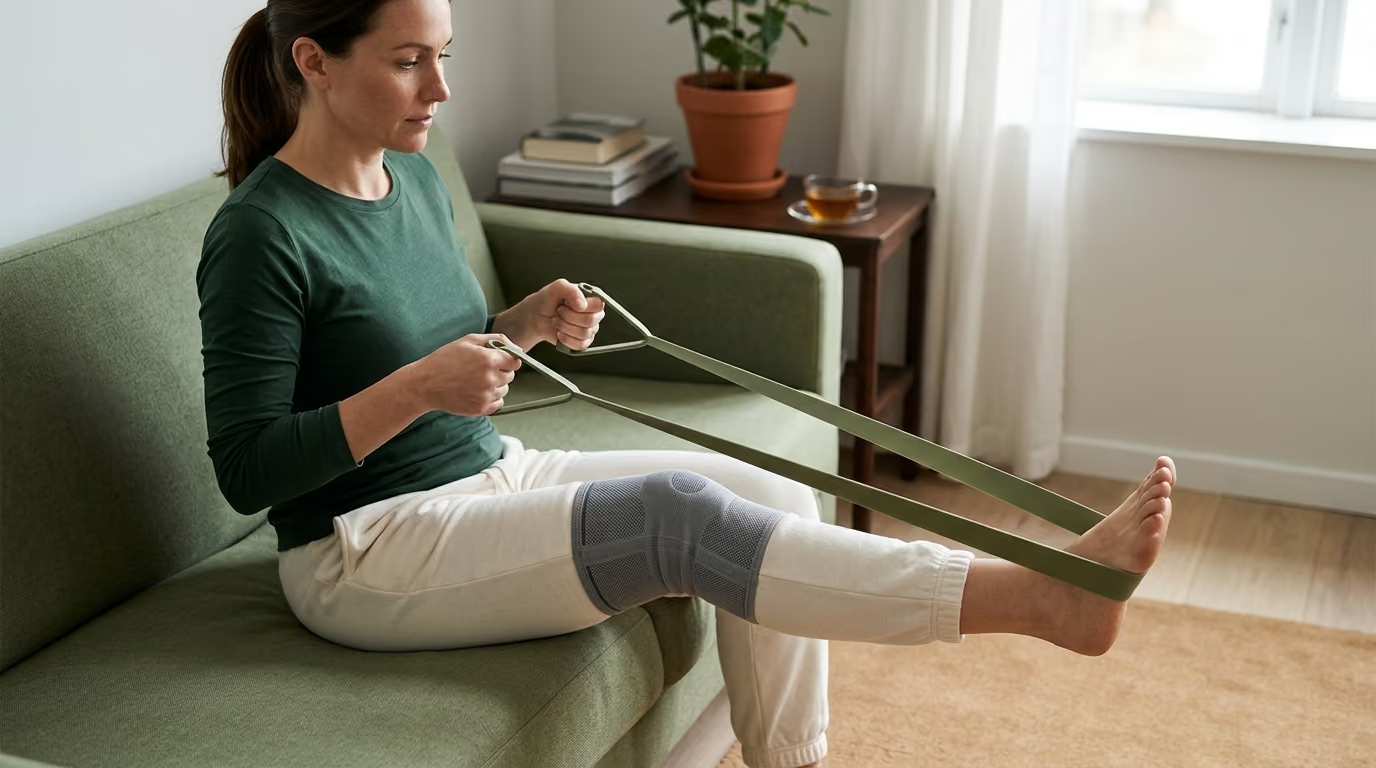
Active-assisted range of motion occurs when you initiate a movement using your own muscular effort but receive assistance from an external tool or person to complete the arc. Common examples include using a wooden dowel to assist shoulder elevation, sliding a heel along a smooth board with a strap, or using your healthy arm to guide an injured elbow through flexion.
Active-assisted work bridges the gap between passive motion and full active loading. It allows your nervous system to begin firing motor units without bearing the full weight of the limb.
Active range of motion is movement produced entirely by your own active muscle contractions against gravity, without external assistance. Achieving full active motion requires both clear mechanical joint space and sufficient neuromuscular strength to move the limb.
If your passive range is significantly greater than your active range, your limitation is driven by muscle weakness, pain inhibition, or tendon discontinuity rather than pure joint stiffness.
Functional range of motion represents the specific degree of mobility required to perform meaningful daily tasks, occupational duties, or athletic drills. You do not always need maximum anatomical range of motion to perform at a high level.
For example, walking downstairs requires roughly 90 to 100 degrees of knee flexion, while reaching a high cupboard requires around 120 degrees of shoulder flexion. Functional recovery prioritizes restoring the specific arcs of movement you need to live and work effectively.
The foundational principle of joint restoration is progressive exposure. Progressive exposure means introducing the exact amount and type of physical stress that your healing tissues can tolerate today, monitoring the physiological response over 24 hours, and progressing the exercise load only when your symptoms remain stable.
Tissue tolerance is the total mechanical and physiological load that an injured or deconditioned joint can accept without provoking an inflammatory flare, increasing resting pain, worsening swelling, or threatening a surgical repair. Tissue tolerance is never static. It changes based on the stage of biological healing, your sleep quality, systemic stress levels, prior training history, and the volume of daily activity you perform.
A consensus guideline published in the Journal of Orthopaedic & Sports Physical Therapy on shoulder rehabilitation emphasizes that restoring joint function requires the careful application of controlled stress to healing tissues through coordinated ranges of motion, progressive stabilization, and functional loading. Pushing beyond biological tissue tolerance forces the body into an inflammatory defense state. When this happens, local swelling increases, fluid pressure inside the joint rises, and pain receptors trigger severe muscle spasms that restrict movement further.
To gauge tissue tolerance accurately, you must monitor your body across three distinct phases of every exercise session:
First, assess how the joint feels during the movement. Discomfort should remain mild, manageable, and stable rather than escalating sharply with every repetition.
Second, assess the joint immediately after the session. The area should feel lightly worked, but it should not exhibit hot, throbbing, or debilitating pain.
Third, evaluate the 24-hour response the following morning. If your joint feels significantly stiffer, shows increased swelling, or produces sharp resting pain that lasts more than 24 hours, you have exceeded current tissue tolerance.
When a flare occurs, you do not need to abandon rehabilitation entirely. You simply need to adjust the loading variables downward during your next session by reducing the range, repetitions, or hold times until your baseline stability returns.
Restoring range of motion safely requires moving through structured, sequential phases. You should never skip a phase or rush into resisted training before establishing base mobility and motor control.
Before performing any joint mobilization, you must establish the exact biological and surgical boundaries set by your medical team. Different surgical procedures have strict contraindications designed to protect delicate repairs.
For instance, an acromioclavicular joint reconstruction protocol from Massachusetts General Hospital restricts active shoulder motion, prohibits reaching behind the back, and caps passive motion to under 90 degrees during early healing. Similarly, reverse shoulder arthroplasty protocols often limit external rotation to 30 degrees for the first month to prevent joint dislocation.
You must know your weight-bearing status, brace locking angles, and prohibited planes of movement before beginning any physical routine.
When an injured joint is immobilized, surrounding body segments often remain completely healthy and must be kept active. Performing gentle movements in adjacent joints maintains local blood flow, supports lymphatic drainage to reduce swelling, and prevents secondary stiffness in uninjured tissues.
If your shoulder is immobilized in a sling, you can usually perform active wrist circles, finger flexions, grip squeezes, and gentle elbow bends if cleared by your surgeon. If your knee is locked in an extension brace, you can often perform ankle pumps and hip rotations.
National Health Service postoperative recovery guidelines recommend early circulation exercises and regular gentle movement of uninjured joints to maintain systemic circulation and prevent blood clots. However, ensure that moving adjacent limbs does not create unwanted torque or tension across the primary healing repair.
Once your physician clears the injured joint for initial movement, begin with slow, low-load, controlled mobility. The objective in this phase is to reintroduce fluid gliding and reduce capsular adhesions without placing tensile stress on healing muscles or tendons.
Movement should always be performed within a pain-free or mildly uncomfortable arc. Useful techniques include:
Perform these movements smoothly and slowly. Pause at the edge of available motion for two to five seconds without bouncing or forcing, then return slowly to the starting position. Distribute these gentle sessions throughout the day in short bouts rather than performing one exhausting workout.
Once passive and active-assisted movements reach acceptable ranges without provoking inflammation, you must teach your central nervous system how to control those new joint positions independently. Passive motion creates available room in the joint, but active control keeps the joint stable and functional.
Begin with submaximal isometric contractions near the newly acquired end-range positions. Isometric holds recruit motor units, stimulate tendon remodeling, and build neuromuscular confidence without the risk of joint shear.
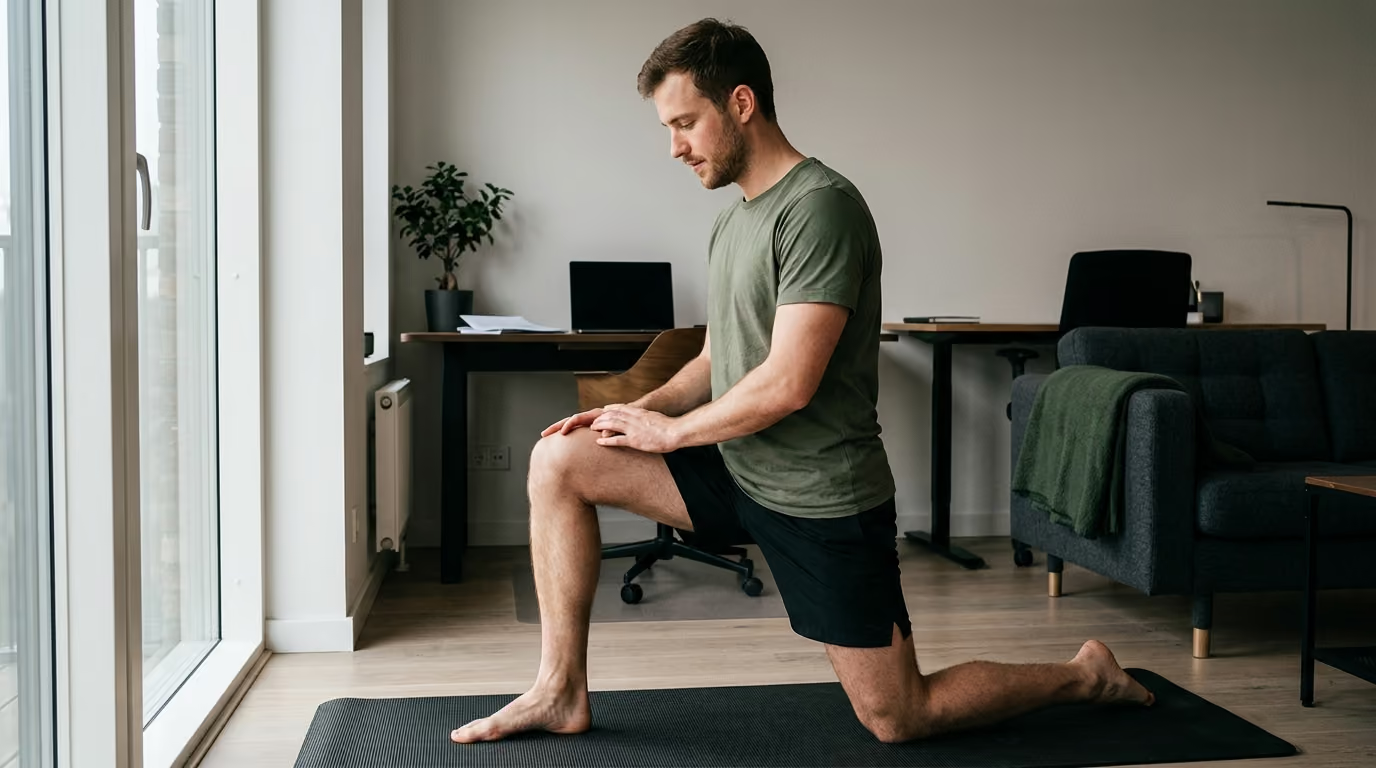
Gradually transition from isometric holds to unassisted active range of motion against gravity. Focus on smooth, unhurried tempo and eliminate compensatory movement patterns, such as shrugging the shoulder during arm elevation or swinging the hips during knee flexion.
For additional strategies on physical recovery, consult our guide on rehabilitation, sleep, and physical recovery strategies.
Achieving unassisted active range of motion is not the final step. Connective tissues must be loaded under progressive resistance throughout their entire movement arc to build true resilience against reinjury. A joint that is only strong in mid-range positions remains highly vulnerable when forced into end-range positions under load.
Begin loading the newly recovered range using light resistance bands, light dumbbells, or bodyweight variations. Emphasize the eccentric phase of each repetition, taking three to four seconds to lower the weight under control.
Eccentric loading stimulates longitudinal tendon remodeling, promotes collagen alignment, and increases functional muscle fascicle length. Progress the resistance gradually over several weeks while monitoring the joint for delayed swelling or stiffness. For comprehensive training advice, check out our structured strength and conditioning resources.
The final phase of mobility restoration connects isolated joint capacity back into dynamic, real-world movements. Daily life and athletic tasks rarely occur in a single plane of motion at a predictable speed.
Progress from single-plane, controlled exercises to multi-planar movements, variable-speed drills, and compound functional patterns. Examples include:
Introduce unpredictability, balance challenges, and speed only after your strength and joint mechanics have fully normalized across earlier phases. You can read more about building resilient physical fitness in our long term physical training and performance section.
Rather than viewing rehabilitation as simply stretching harder or doing more repetitions, you should adjust seven distinct loading variables to match your tissue capacity. Manipulating these variables allows you to fine-tune your recovery plan without overloading healing joints.
Always begin exercises well within your established comfortable zone. Move toward the boundary of restriction in small increments of a few degrees at a time. If an orthopedic guideline sets a hard boundary, such as 90 degrees of flexion, treat that boundary as an absolute safety wall rather than a target to exceed.
Apply the minimum external force required to produce a mild stretching sensation. Forceful manual pressure applied by a training partner or aggressive self-stretching can micro-tear healing collagen fibers and trigger joint effusion. Let gentle position and gravity do the work.
Hold times must match the irritability of the joint. When a joint is highly irritable, short holds of five to ten seconds are safer because they avoid provoking ischemia and muscle guarding. Once a joint displays low irritability and stable resting symptoms, hold durations can be gradually increased to 20 or 30 seconds to promote viscoelastic tissue creep.
Frequent, low-dose movement sessions are vastly superior to a single long, aggressive workout. Performing three to four brief five-minute mobility sessions spread evenly throughout the day provides consistent biological signals for tissue remodeling. This routine keeps joint fluid circulating without fatiguing surrounding stabilizer muscles.
All mobility exercises in early and intermediate recovery should be performed at a deliberate, slow tempo. Fast or ballistic movements activate the myotatic stretch reflex, causing the muscle spindle to contract the muscle defensively to prevent perceived injury. Slow movements allow the nervous system to relax and accept the extended joint position.
External resistance should be added only after full active movement through the desired range is achieved without pain. When adding resistance, start with submaximal isometric holds, advance to light elastic resistance, and finally progress to free weights or bodyweight leverage.
Start with isolated, single-plane movements where your body is fully supported, such as lying flat on your back on a mat. As neuromuscular control improves, progress to seated, standing, and finally dynamic multi-planar movements that challenge balance, core stability, and joint proprioception simultaneously.
The scientific literature surrounding post-injury and postoperative mobilization has evolved significantly over the past two decades. Understanding what the evidence proves versus where clinical uncertainty remains helps you make informed choices during recovery.
There is strong scientific consensus that prolonged, unnecessary immobilization is detrimental to musculoskeletal health. A systematic review published in Sports Medicine demonstrated that human limb immobilization leads to rapid reductions in muscle fiber size, decreases in tendon stiffness, and a marked reduction in voluntary motor unit activation.
Furthermore, a comprehensive 2024 systematic review and meta-analysis published in Frontiers in Physiology confirmed that structured stretch training performed consistently for at least two weeks produces chronic, measurable increases in joint range of motion.
Clinical trials on upper limb injuries consistently show that early, protected mobilization leads to faster functional recovery. A review published in the Cochrane Database of Systematic Reviews examining early versus delayed mobilization after upper-limb fractures found that patients with proximal humerus and distal radius fractures who engaged in early protected movement regained wrist and shoulder function faster than those kept immobilized for prolonged periods.
While early movement is beneficial, the evidence does not support an aggressive, one-size-fits-all approach. In many conditions, early motion accelerates short-term recovery without showing measurable differences in long-term outcomes.
For example, a systematic review on ankle fracture rehabilitation in the Journal of Foot and Ankle Research showed that while early mobilization improved short-term ankle range of motion and allowed individuals to return to work faster, the range of motion advantages largely disappeared after one year. Additionally, some early mobilization protocols carried a slightly higher risk of wound healing complications or superficial infections when movement was started before surgical incisions had fully closed.
Similarly, a systematic review published in the Journal of Shoulder and Elbow Surgery evaluated conservative treatments for post-traumatic elbow stiffness. The authors noted that while non-surgical rehabilitation is universally recommended as the primary first-line intervention, the overall quality of evidence was low to very low certainty.
The data was insufficient to declare one specific stretching protocol, splinting design, or manual therapy technique definitively superior to all others. This uncertainty highlights that rehabilitation must be tailored to individual tissue response rather than rigid, universal formulas. For a broader perspective on health evidence, review our evidence-based health resources.
Rehabilitation approaches must vary dramatically depending on the specific anatomical structure involved and the mechanical integrity of the surgical repair. Examining specific case patterns illustrates why protocols cannot be applied interchangeably.
In a rotator cuff repair, a tendon is physically re-anchored into bone using suture anchors. The priority during the first six weeks is absolute structural protection of the biological repair site.
Rehabilitation guidelines from Sanford Health explicitly prohibit active shoulder movement, resisted muscle contraction, lifting, pushing, pulling, or pushing off armrests during transfers during early phases. Passive range of motion is introduced in strictly defined planes to prevent capsular freezing, but aggressive or painful stretching is banned to avoid overloading the suture anchors. Active motion is delayed until biological tendon-to-bone healing has matured.
Following a total knee arthroplasty, the mechanical joint has been replaced with metal and polyethylene components that do not require biological tendon healing. Therefore, movement begins almost immediately.
A post-operative protocol from Brigham and Women’s Hospital emphasizes early weight-bearing as tolerated, immediate active-assisted heel slides, and aggressive focus on achieving zero degrees of full knee extension. However, the protocol restricts external resistance exercises early on and strictly prohibits rotational torque or twisting across the knee to protect the prosthetic interface and allow soft tissues to settle.
The elbow is one of the most reactive joints in the human body and is notoriously prone to severe arthrofibrosis and heterotopic ossification following trauma. When recovering from a casted elbow fracture, rehabilitation emphasizes frequent, gentle active-assisted flexion, extension, and forearm pronation-supination within a comfortable range.
Aggressive, forceful manual stretching is avoided because aggressive stretching of an irritated elbow often triggers acute inflammatory responses and worsening bone-forming reactions in surrounding muscle tissue. Controlled, repeated low-load movement performed multiple times daily is the standard clinical method.
After weeks in a non-weight-bearing cast for an ankle fracture or severe ligament tear, the ankle joint exhibits severe capsular restriction, calf muscle shortening, and balance deficits. Safe progression starts with unweighted ankle pumps, alphabet drawing, and gentle towel stretches in sitting positions.
Once full weight-bearing is cleared by the surgeon, the focus shifts toward restoring normal heel-to-toe gait mechanics, calf eccentric strength, and single-leg balance. Loading volume and walking distance must be progressed separately from resistance exercises to avoid triggering Achilles tendonitis or joint effusion.
Unlike a tendon repair where movement is restricted to protect healing sutures, an arthroscopic capsular release is performed specifically to cut away dense, fibrotic scar tissue. In this scenario, immediate and frequent movement is essential to prevent newly divided tissues from adhering together again.
Patient guidance from the National Health Service advises patients to begin multi-directional shoulder exercises immediately after the nerve block wears off. Patients are instructed to move through full available ranges three to five times daily to lock in the mobility gains achieved during surgery.
A successful physical recovery depends on an active feedback loop between your home exercise routine and your supervising physical therapist or surgeon. Home exercise is where the daily biological stimulus occurs, while the clinical visit provides objective evaluation, manual guidance, and protocol progression.
A clinical guide from the National Health Service on physiotherapy outlines physical therapy as an evidence-based medical service designed to restore movement, improve physical strength, and build stamina following surgery or illness. Your physical therapist acts as a biomechanical guide, identifying subtle compensatory habits, assessing joint translation, and determining when your tissues are ready to transition between phases.
To maximize your recovery, maintain a simple daily exercise log. Record the exercises you performed, the repetitions completed, how the joint felt during movement, and your symptom status the following morning. Bring this log to your appointments along with a concise list of practical questions:
By actively tracking your 24-hour response and communicating clearly with your healthcare team, you ensure your rehabilitation remains safe, structured, and effective.
Navigating joint rehabilitation requires unlearning several pervasive myths that lead to physical setbacks, chronic inflammation, or structural failure.
The belief that joint restoration requires painful, aggressive stretching is one of the most harmful misconceptions in physical rehabilitation. While mild muscular stretching discomfort is normal, intense, sharp pain triggers reflexive muscle splinting, damages healing collagen fibers, and provokes joint swelling. Effective mobility work operates at the edge of tolerable comfort, allowing the nervous system to relax into the movement.
A patient can often recruit compensatory muscles to physically lift a limb long before a surgically repaired tendon is strong enough to handle that tensile force. Just because you can force your arm overhead using your trapezius muscle does not mean your repaired rotator cuff can tolerate that load. Always adhere to structural precautions regardless of how capable you feel.
Many individuals assume that passive stretching carries zero risk because muscles are not actively contracting. In reality, passive stretching applies significant tensile and shear loads directly across joint capsules, ligaments, and surgical repair sites. Forcing passive motion beyond prescribed post-operative boundaries can stretch or tear a surgical repair just as easily as active lifting.
Standard rehabilitation protocols list estimated week-by-week timelines, but biological tissue healing varies widely between individuals. Your readiness to advance depends on structural healing, swelling control, baseline strength, and motor coordination, not simply the number of days since your injury. Always progress based on objective clinical milestones rather than calendar dates alone.
When a specific movement plane feels exceptionally stiff, the natural impulse is to stretch it aggressively. However, that restriction may be an intentional protective limitation designed into your surgical protocol to shield a specific repair. Challenging a restricted plane prematurely can disrupt healing tissue. Always verify that a restricted motion is cleared for aggressive work before attempting to force it.
While mild muscular aching, joint stiffness, and minor discomfort are normal parts of the recovery process, certain clinical symptoms indicate severe complications that require prompt evaluation by your surgeon or physician.
A post-operative protocol from Brigham and Women's Hospital identifies critical red-flag symptoms that warrant immediate medical communication. Stop all rehabilitation exercises and contact your medical team if you experience:
Never attempt to work through red-flag symptoms. Prompt medical assessment protects both your long-term joint function and your overall health.
Recovery timelines vary based on the specific injury, the duration of immobilization, and individual healing rates. Minor soft-tissue sprains immobilized for one to two weeks may regain functional range of motion within four to six weeks of targeted exercise.
Complex surgical repairs, such as rotator cuff reconstructions, anterior cruciate ligament reconstructions, or multi-fragment fracture repairs, often require three to six months to regain full active mobility and up to a full year to achieve peak strength and functional capability. Focus on consistent, incremental progress rather than fixed calendar dates.
Painless clicking, popping, or crepitus is common during range of motion recovery. As joint fluid circulates, pressure changes can cause gas bubbles to form and pop within the synovial fluid, a harmless process known as cavitation.
Additionally, tendons and scar tissue bands may click as they glide across bony prominences during early movement. As long as the clicking is not accompanied by sharp pain, sudden joint locking, or immediate swelling, it is generally safe to continue your prescribed exercises.
Yes, significant improvements in range of motion and functional capability can be achieved long after an initial injury has healed. While remodeling mature, dense scar tissue and chronic capsular contractures takes longer than addressing acute stiffness, connective tissue remains biologically responsive to mechanical stress.
A program combining targeted passive stretching, eccentric strengthening, and neuromuscular control drills can yield meaningful functional gains even years after an initial trauma. Consult a physical therapist to evaluate whether your limitation is driven by modifiable soft tissue or bony structural changes.
Waking up with increased joint stiffness, localized swelling, or elevated resting pain is a classic sign of an exercise overdose. It indicates that the volume, intensity, or hold duration of your previous session exceeded current tissue tolerance.
When this happens, reduce your exercise load for the next 24 to 48 hours. Focus on gentle, unweighted circulatory movements and active-assisted range of motion within a comfortable zone. Once symptoms return to your normal baseline, resume your progression with shorter hold times, fewer repetitions, or a slightly reduced movement arc.
This article is for educational and informational purposes only and does not constitute formal medical advice, diagnosis, or treatment. Restoring range of motion after an injury, surgical procedure, or period of immobilization involves specific clinical risks based on individual health history, surgical techniques, and tissue healing rates.
Never alter, ignore, or accelerate post-operative precautions, weight-bearing limitations, or movement restrictions without the direct supervision and approval of your orthopedic surgeon, physical therapist, or qualified healthcare provider. If you experience severe pain, spreading redness, calf swelling, shortness of breath, or signs of infection, seek immediate medical attention.
Follow BattleVet for practical guidance on military and veteran health, strength, recovery, testosterone, sleep and healthy aging. Stay connected for new articles, research backed insights and clear information to help you stay capable for the years ahead.


Build better habits around strength, recovery, sleep, hormones and healthy aging with practical guidance for active military personnel and veterans.
Explore BattleVet